

Last Updated on March 19, 2024 by Chuck Wilson
Steps to install a golf cart battery meter are:
- Select and obtain your battery gauge meter
- Once you have the meter of your choice, select the mounting location.
- Disconnect the positive terminal on the battery bank.
- Prepare the opening if you are mounting in the dash
- Run the wires from the meter location to the battery terminal points.
- Make the connections and test.
- Mount the meter and arrange the wiring.
Detailed Instructions:
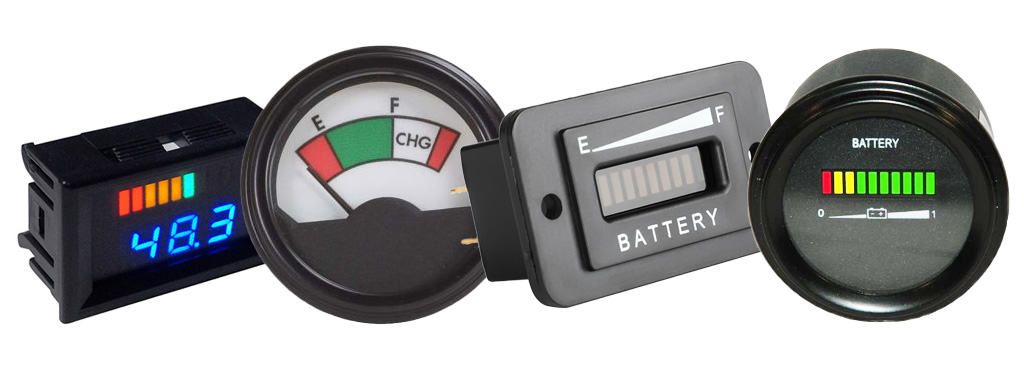
A battery meter (or battery gauge) is a device you add to your electric golf cart to read the state of charge level for your battery bank. They come in either analog or digital, square or round, surface or in-dash mount.
Battery meters indicate the voltage level of your battery bank and inform you when it is time to recharge. They act as a battery charge indicator as well and give a visual confirmation that the batteries are charging. The input voltage comes directly from the battery bank through the signal wires, and in the case of analog meters, move the needle from empty on the far left too full on the far right. The digital meters will give you a number or a moving bar display a partial charge to a full charge.
A battery meter is a great accessory to add to your golf cart and it only requires a minimum amount of skill to install it yourself. Once you have acquired your battery meter, you will need to locate the best place on your dash to mount it, either surface mounted or in-dash. If it is a square LED type, you can surface-mount or put it in-dash. If it is a round gauge (analog or digital) it will need to be in-dash to look it’s best.
Choosing The Best Location To Mount The Battery Meter
Surface mounting your meter battery meter is the easiest method and may be best for your application. You always want to pick a spot that you can see the meter easily from the driver’s seat. if you use velcro strips or zip ties to secure your battery meter, you will need to snake the wires behind the console either through a hole you make or a handy crevasse in the dash. LED and digital style battery meters only come with about 6 to 12 in of wire pigtails, so you will need to add extra wire to reach the terminals necessary to power the meter.
If you are preparing to do an in-dash installation, you must check behind the proposed location to make sure that there are no obstructions to prevent the meter from going in completely. Once the hole is cut it will not be easy to undo it, so make sure that the spot you picked out is going to allow the meter to go in completely. Also, check to make sure there are no wires in the way that can be severed during the installation.
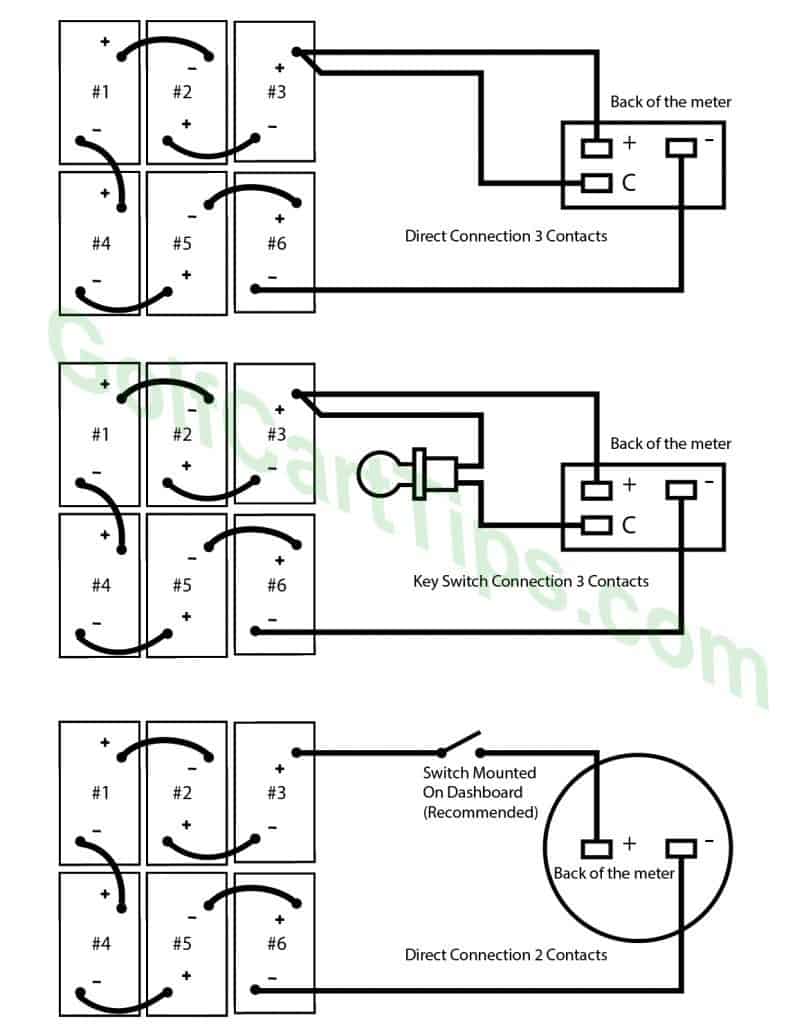
Typical battery meters come with either two or three contacts on the back. One of these is a common or a “C” signal terminal and the other two are the positive terminal and the negative terminal (See illustration below). the “C” provides power to the meter to operate and doesn’t involve measurement input voltage at all. It is best to wire this terminal to the Power contact on the ignition switch. This will allow the key to switch the meter on and off when the cart is in use.
Some golf cart wire harnesses, such as the Club Car Precedent, have a provision for these wires built into the harness already. Check your manual to see if you can skip running wire to the battery bank of the cart.
If your golf cart has a power reducer installed for headlights and other accessories, this would be a good power source for your charge meter. The power reducers are usually switched with the key and would eliminate needing to run a separate cut-off.
Here are the steps to follow for a quick and easy battery meter installation:
Tools and materials needed
For an in-dash mount
- Dremel to cut the slot for the meter
- Holesaw and drill, if you have a round meter
- Wire stripper
- Butt connectors and crimper
- Electrical tape
- Several feet of stranded wire (12Ga to 18Ga will work)
For a Surface Mount
- Velcro strips or zip-ties
- Mounting screws that come with the analog or digital meter
Step by Step Instructions
Step One – Select the mounting location for your meter
As mentioned before, pre-plan where you want to mount the battery charge indicator, and if it is in the dash, mark the square or circle that needs to be cut out.
Step Two – Disconnect the positive terminal on the battery bank
We want to prevent any shorts or arcing while we work. Electrical fires and fiberglass do not mix.
Step Three – If mounting in the dash, prepare the opening
Put on your safety goggles and use your drill, Dremel, or other cutting tools to cut along the pre-prepared lines you’ve drawn on the dashboard. Again, make absolutely certain there’s enough space behind the dash surface to allow for the depth of the meter. If you are attaching a signal wire to the key switch, try to pull the key switch to the point where you can access the back negative and positive terminals. If you are installing a toggle switch to turn your battery charge indicator on or off, drill the hole for this switch at the same time.
Please note that an on-off switch is not entirely necessary and the draw on the batteries to have the meter on full time is minimal, a sure way to keep your batteries from draining unnecessarily would be to install a method to turn it off.
Step Four – Run your wires
You will want to run your wires from the hole that you prepared throughout the car to reach the power sources to power your meter. I use butt connectors to attach the wires together, but you can just twist the wires together and either heat shrink tubing over-the-top or use electrical tape to prevent shorts. Watch closely to make sure the positive wires go to positive terminals, and negative wires go to the negative terminal or ground.
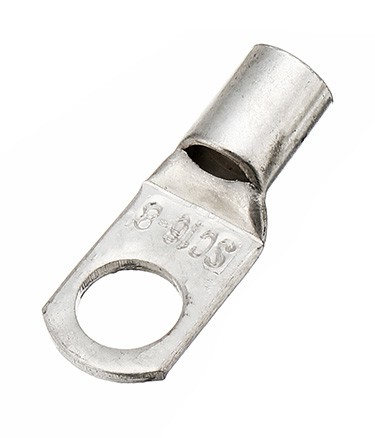
A lug connector crimped on the terminating end of the wire makes a professional connection on the switch and battery connection terminals.
Step Five – Make your connections
Using the chart above, make your connections but do not put the components into the dashboard until you have tested your work. Connecting the positive lead to the battery pack again should allow the meter to show the battery charge level. If your charge meter is connected to the key switch, turn it on and check that the battery charge level now shows on the charge meter.
Step Six – Put all components back into the dashboard and mount the charge meter.
That is basically it. You should have a valuable tool for measuring your range and when you should head back to the garage.