Installing a golf cart battery meter is a great upgrade. It gives you real-time insights into your cart’s battery levels. This guide walks you through the process, ensuring a safe and effective installation. This article is for you. It covers every detail to help you succeed, whether you’re new to DIY or a golf cart modding expert.
Battery Meter Key Takeaways
Tools and Materials Needed For Installation
Before installing a golf cart battery meter, gather the following tools and supplies to streamline the process:
- Battery Meter: Choose a meter compatible with your golf cart’s voltage (e.g., 36V or 48V systems).
- Screwdrivers: Flathead and Phillips for various screws.
- Wire Strippers and Cutters: These are used to prepare wires.
- Drill and Bits: Necessary if you need to create a mounting hole.
- Multimeter: To check voltage and test connections.
- Electrical Tape: For securing wire connections.
- Pliers: Helpful for gripping wires and crimping.

Step 1: Choose the Right Golf Cart Battery Meter
The first step is selecting a battery meter suitable for your golf cart’s electrical system. Golf carts use 36V or 48V systems. The meter must match the voltage to read accurately.
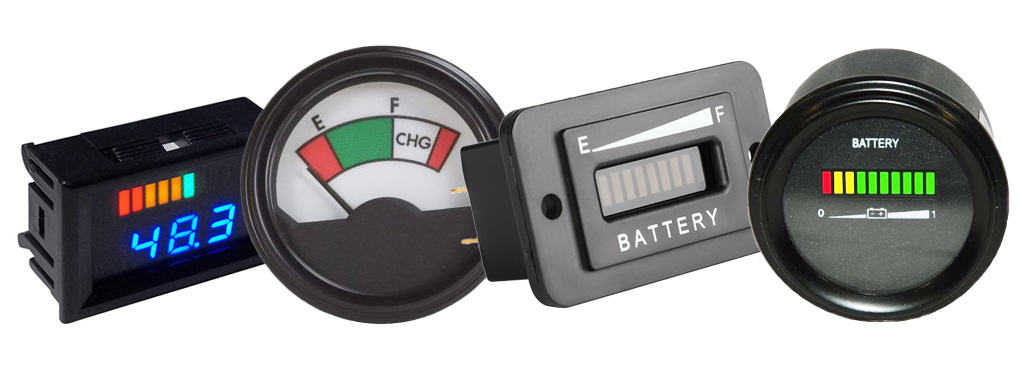
- Digital Meters: Offer precise readings and advanced features.
- Analog Meters: Simpler to use and ideal for quick visual checks.
Check the meter’s compatibility with your cart model. Some brands have unique configurations.
Step 2: Determine the Battery Meter Mounting Location
Decide where to place the battery meter. The dashboard is the most common location, offering clear visibility. Check if your cart has a pre-designated area for accessories.
- If your cart doesn’t have a pre-cut space, use a drill to create a hole that fits the meter tightly.
- Surface Mounting: For some meters, adhesive may be enough. But, ensure the area is clean and flat for a secure fit.
Step 3: Disconnect the Battery Before Installing
For safety, turn off the cart and disconnect the negative terminal of the battery. This step will prevent accidental shocks. It also protects the cart’s electrical system during installation.
Step 4: Prepare the Battery Meter Mounting Area
- Use a drill to create a hole in the dashboard if needed, matching the meter’s size.
- Smooth any rough edges around the hole to prevent wire damage.
- If using adhesive, clean the surface thoroughly to ensure proper adhesion.
Step 5: Wire the Battery Meter
Proper wiring is critical for the battery meter to function correctly. Follow these steps:
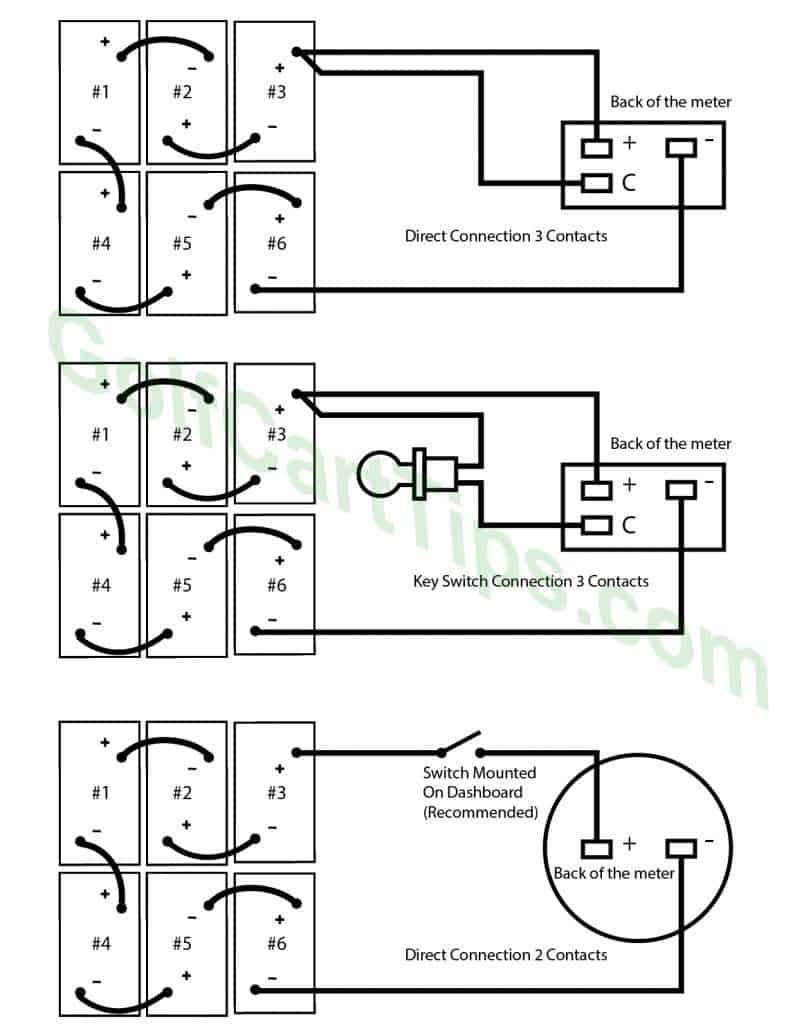
- Positive Wire: Connect the meter’s positive wire to the battery pack’s positive terminal. Or, connect it to the “switched” side of the ignition switch. Using the ignition switch ensures the meter only works when the cart is on. This prevents battery drain.
- Negative Wire: Connect the meter’s negative wire to the battery pack’s negative terminal or the cart’s ground.
- Signal Wire (if applicable): Some meters include a third wire for ignition activation. Connect this wire to the key switch if available.
Use wire strippers to expose each wire’s ends. Then, secure the connections with crimp connectors or electrical tape.

Step 6: Mount the Battery Meter
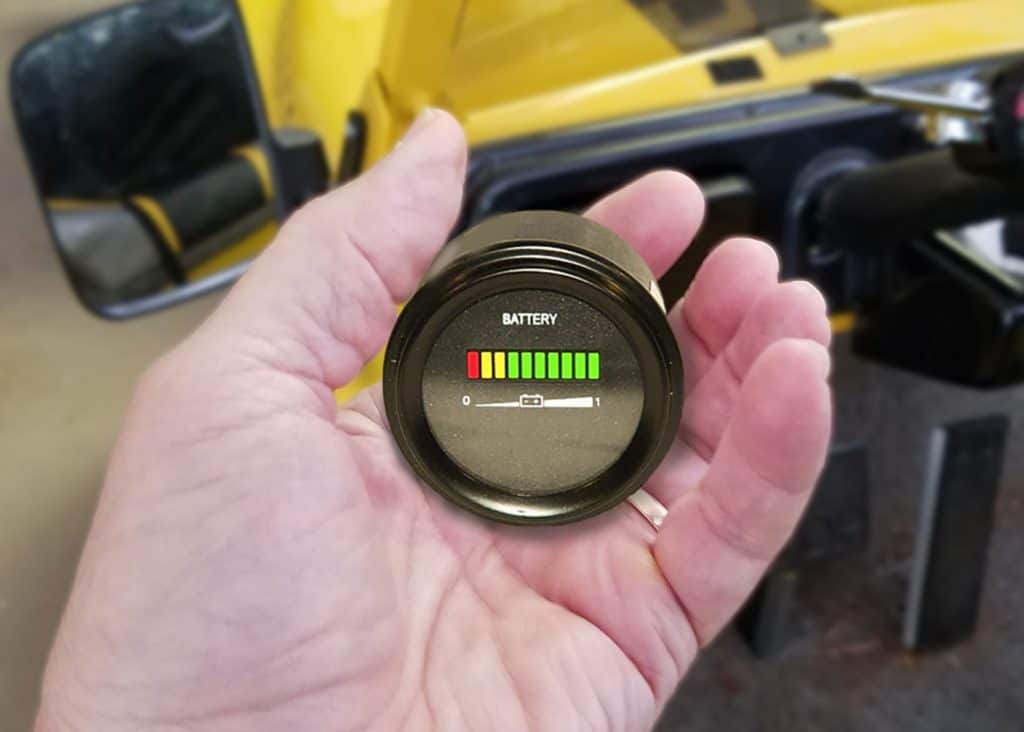
Place the meter in the prepared hole. If needed, attach it to the dashboard with adhesive or screws. Ensure the display is easily visible from the driver’s seat.
Step 7: Test the Battery Meter Installation
Reconnect the battery’s negative terminal and turn on the cart’s ignition. Verify that the meter powers on and displays the battery’s charge level accurately.
- If the meter doesn’t work, recheck the wiring for loose connections or incorrect polarity.
- Use a multimeter to confirm the proper voltage at each connection point.
Common Installation Mistakes to Avoid
- Incorrect Wiring: Check polarity and connections. This will prevent damage to the battery meter or the cart’s electrical system.
- Poor Mounting Location: Ensure the battery meter is easily accessible and secure.
- Skipping Safety Precautions: Always disconnect the battery before working with the electrical system.
Battery Meter Maintenance Tips
- Inspect the meter and connections periodically for corrosion or wear.
- Keep the meter’s display clean for clear visibility.
- Test the meter’s accuracy using a multimeter if you notice inconsistent voltage measurements.
Why Install a Golf Cart Battery Meter?
A battery meter shows your golf cart’s battery life. It helps you avoid unexpected power loss. Regular monitoring extends your battery’s life. It prevents deep discharges, which cause long-term damage.
FAQ
1: What type of battery meter should I choose—digital or analog?
A digital meter offers precise readings and extra features. An analog meter is simpler and gives a quick visual reference. Choose based on your needs. But, ensure the meter works with your golf cart’s voltage system.
2. Where is the best place to mount the battery meter?
The dashboard is the ideal location, as it ensures visibility while driving. If your cart doesn’t have a pre-cut spot, you may need to drill a hole or use adhesive to mount the meter securely.
3. Do I need to disconnect the battery before installation?
Yes, disconnecting the battery—especially the negative terminal—is key. It avoids shocks and protects the cart’s electrical system during installation.
4. Can I connect the meter directly to the battery, or use the key switch?
Both options work. Connecting to the key switch ensures the meter only operates when the cart is on. This prevents battery drain. A direct connection is simpler but may cause the meter to draw power continuously.
5. What tools are necessary for the installation?
You’ll need a few basic tools: a screwdriver, wire strippers, and crimp connectors. If you need to mount something, you’ll also need a drill. Additionally, have some electrical tape and a multimeter on hand for testing purposes.
Final Thoughts
Installing a golf cart battery meter is easy. It improves your cart’s performance. By following these steps, you can install it with confidence. This will ensure reliable measurements and a well-maintained electrical system.


