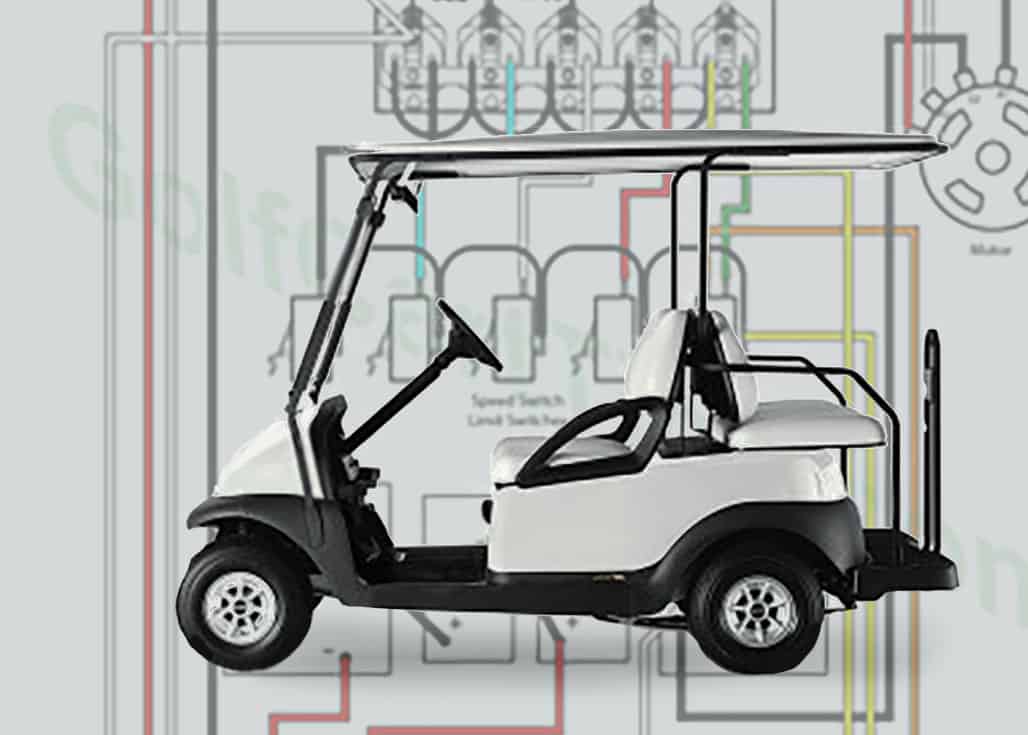
Club Car wiring diagrams standards have been redrawn to be easily read so you can trace out any faulty wiring on your cart with minimum effort. Enjoy!
Remember, always refer to the specific wiring diagram for your model and year of Club Car. If you’re unsure about anything, it’s always best to consult with a professional.
Key Takeaways
- Redrawn for Clarity: The Club Car DS wiring diagrams have been redrawn for easy reading, allowing for efficient tracing of any faulty wiring.
- Model and Year Specific: It’s important to refer to the wiring diagram specific to the model and year of your Club Car.
- Electric Models: The article provides diagrams for various electric models, including:
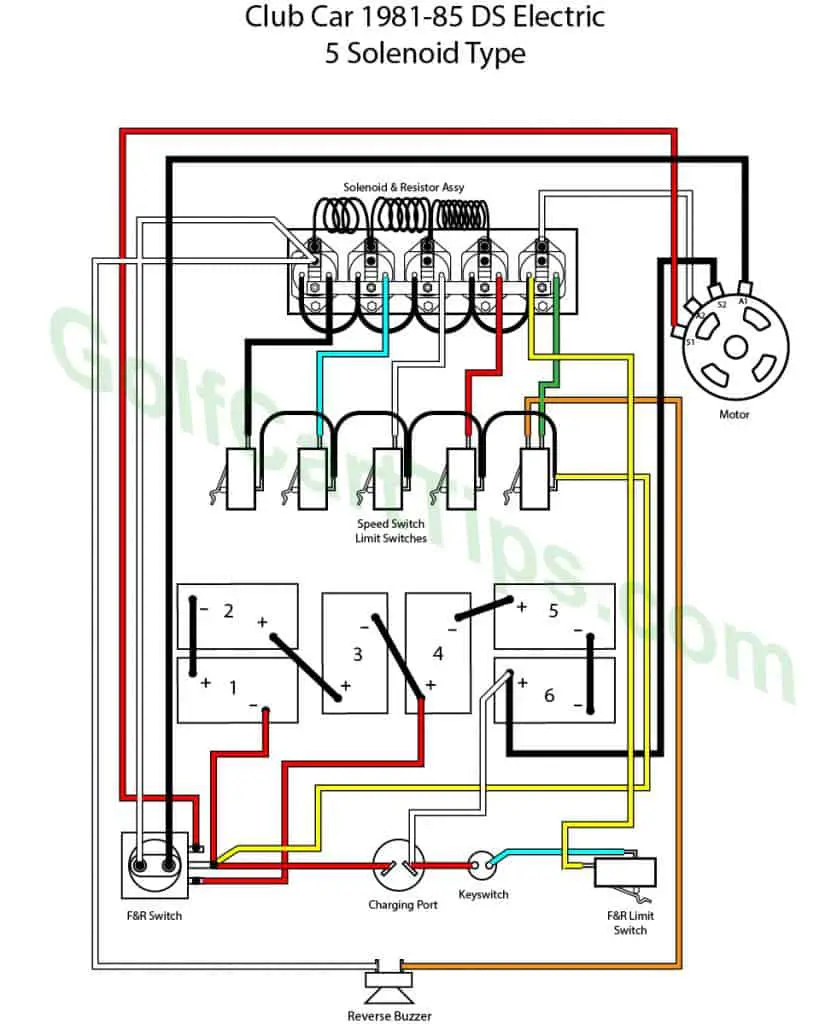
- Club Car DS 1981-85 Electric Golf Cart (5 Solenoid Type)
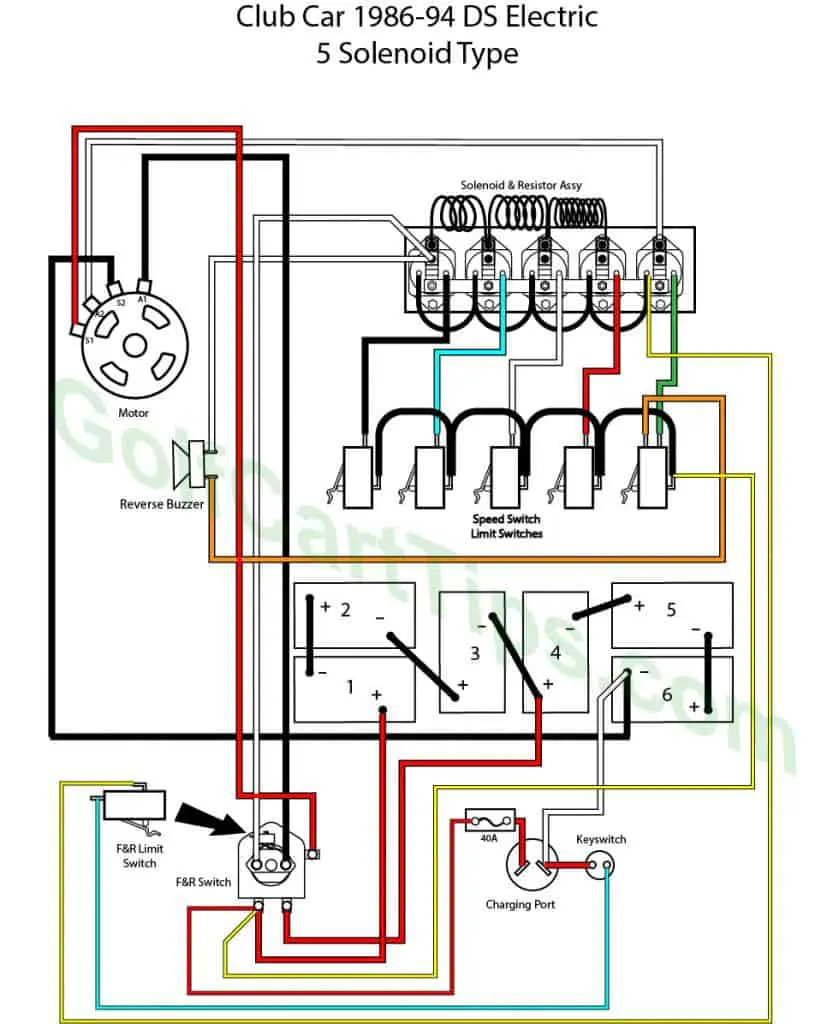
- Club Car DS 1986-94 Electric (5 Solenoid Type)
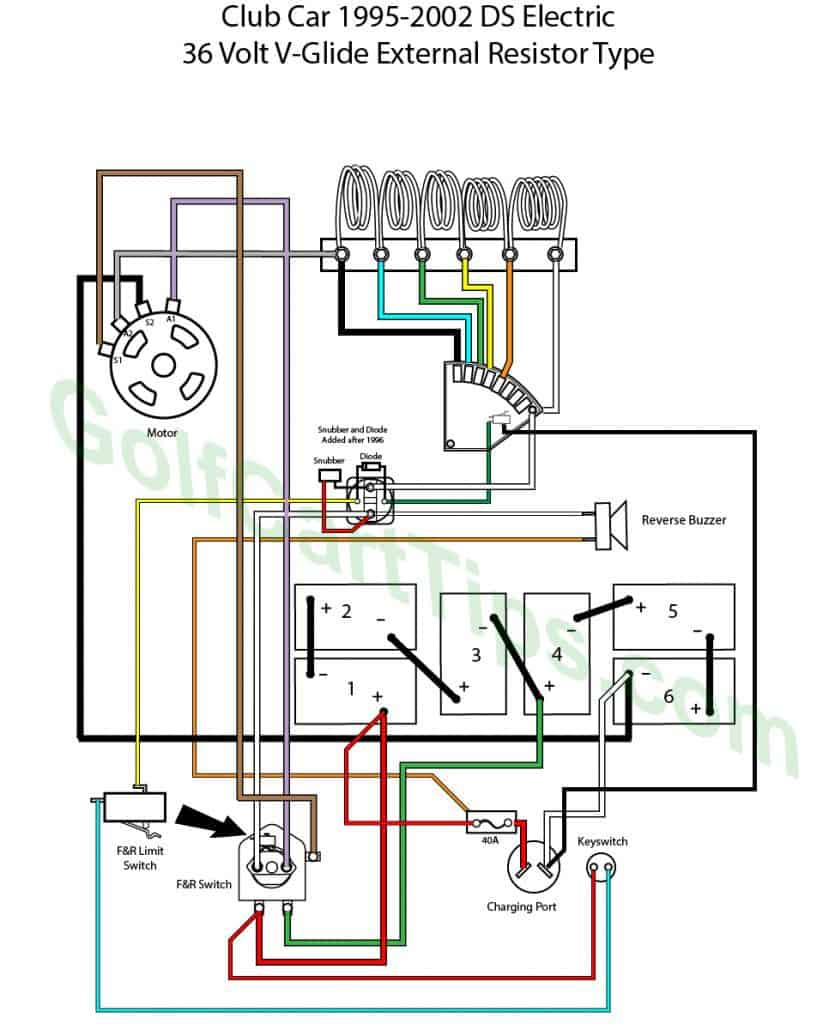
- Club Car DS 1995-2002 Electric (36 Volt V-Glide External Resistor Type)
- Gas Models: Wiring diagrams for gas models are also included, such as:
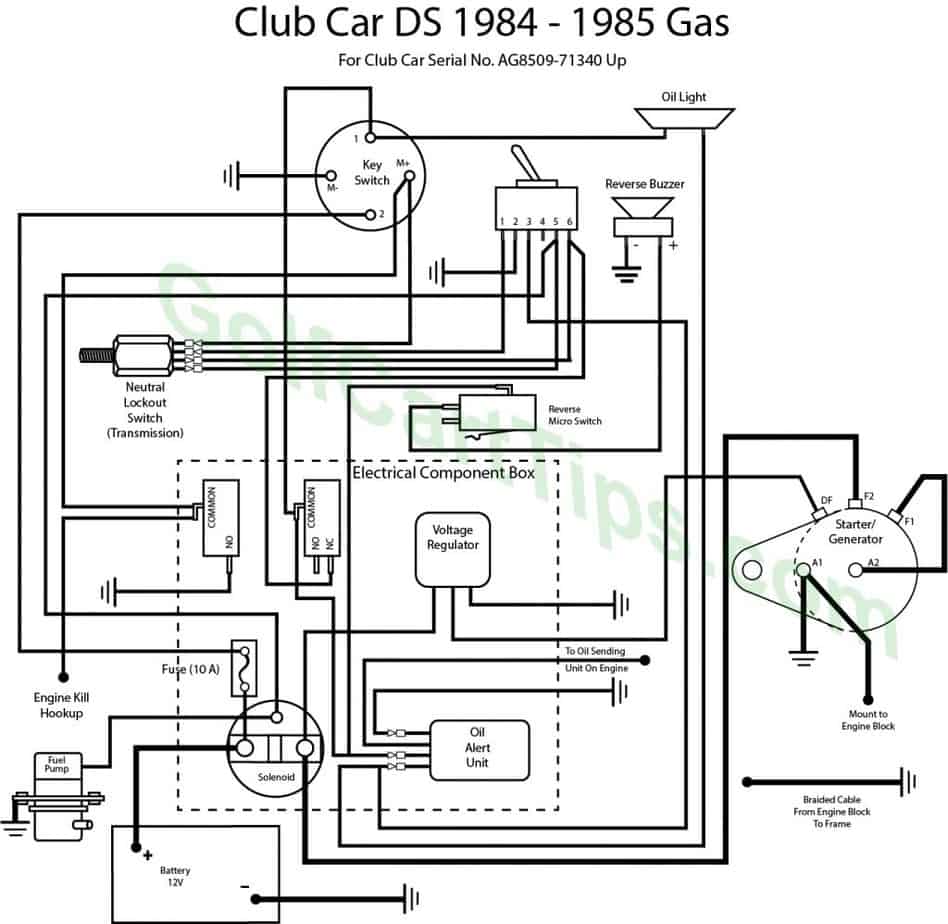
- Club Car DS 1984-1985 Gas Model
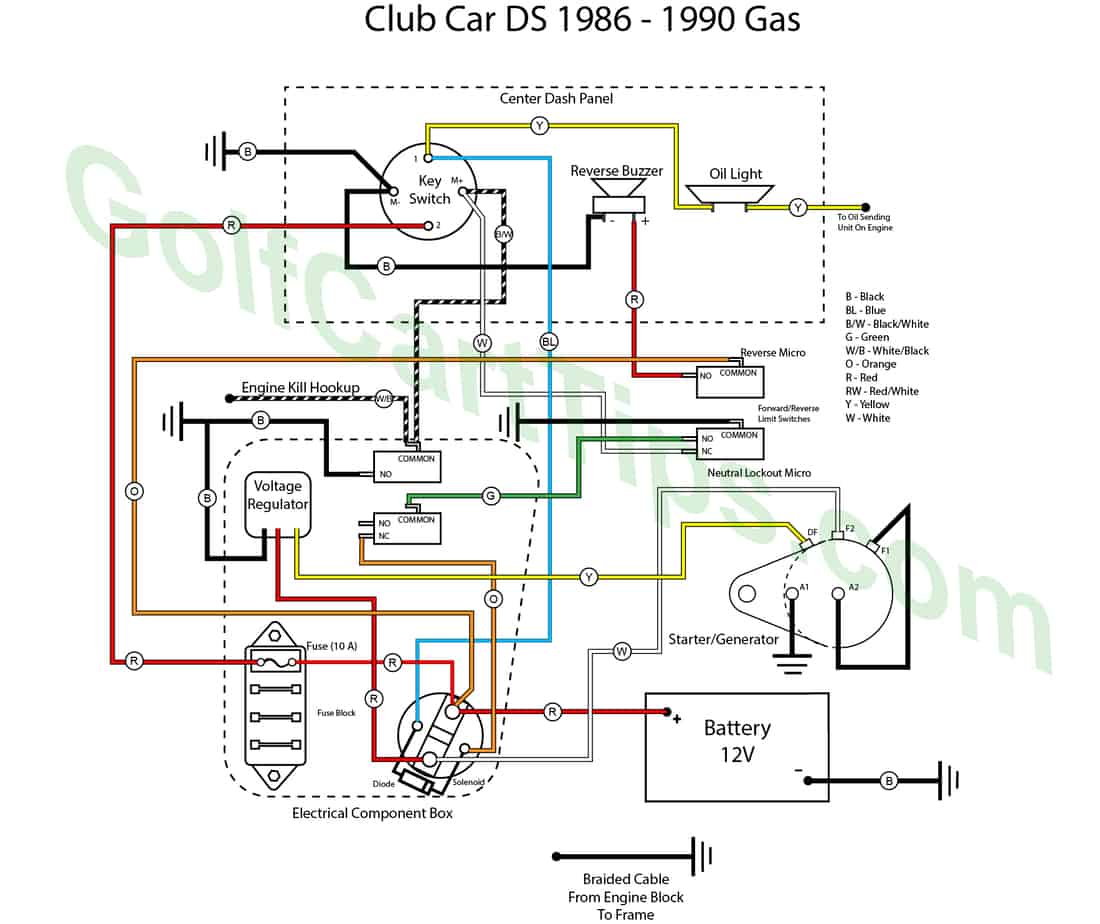
- Club Car DS 1986-1990 Gas Model
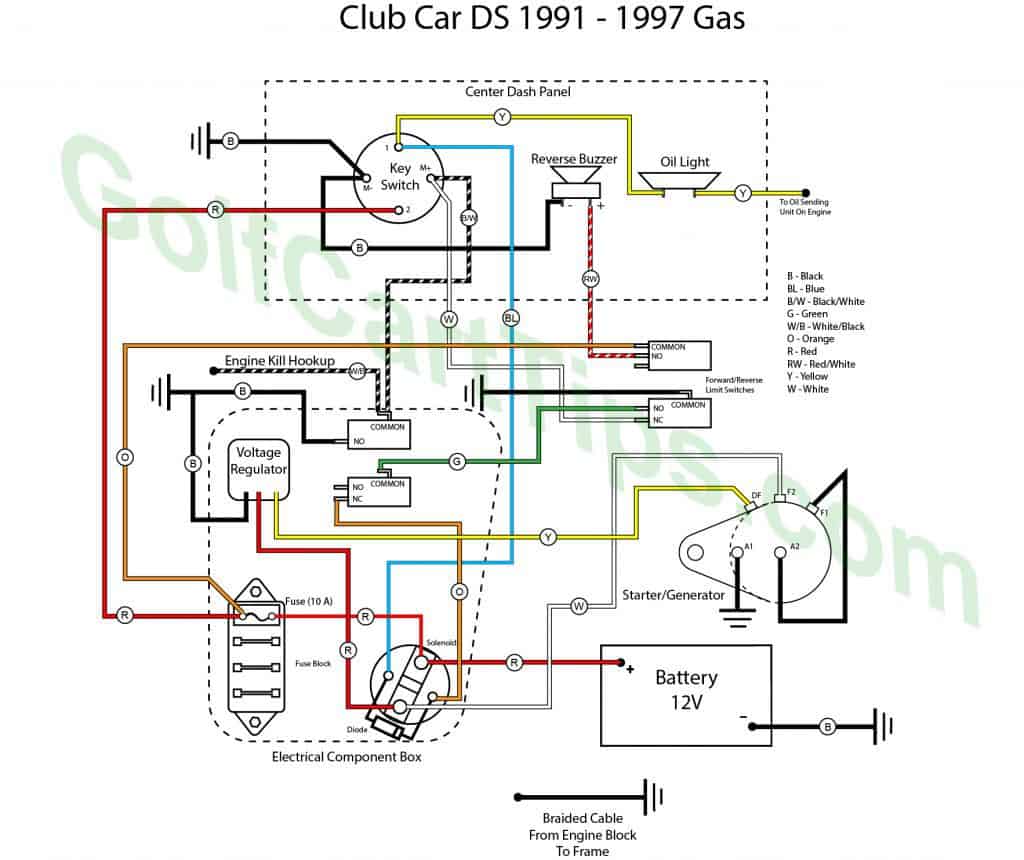
- Club Car DS 1991 – 1997 Gas Model
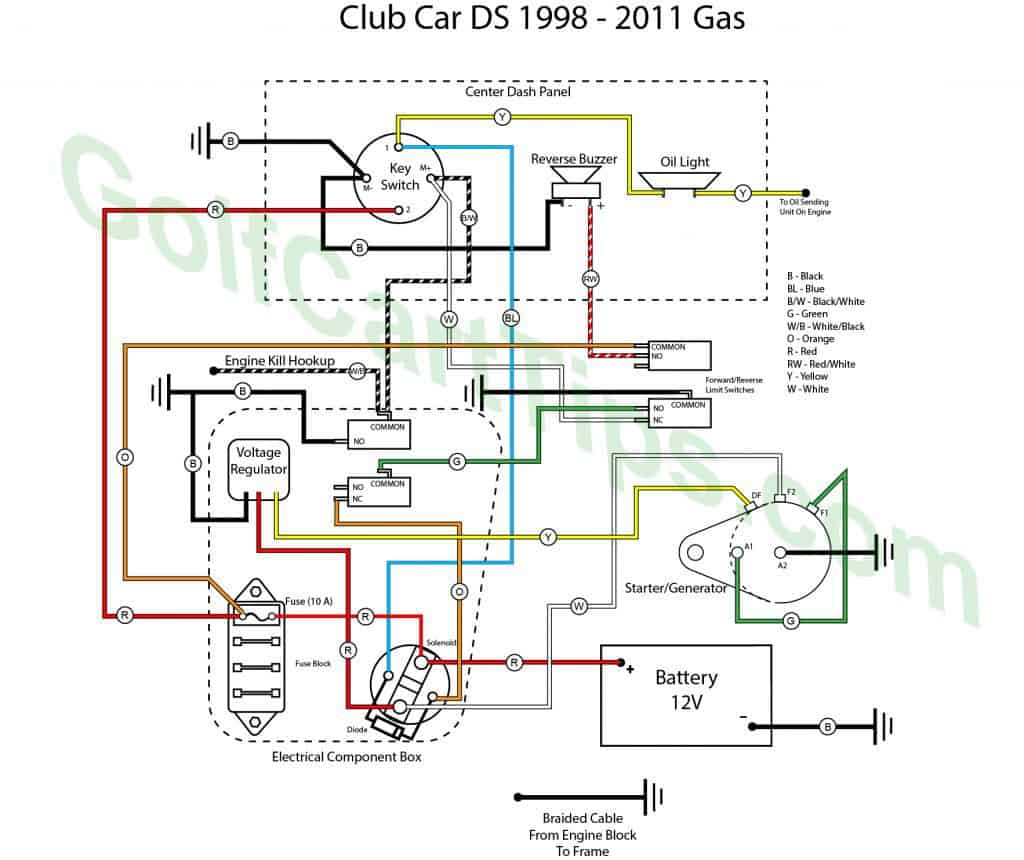
- Club Car DS 1998 – 2011 Gas Model
- Key Components in Diagrams: The diagrams detail various components like the battery, solenoids, motor, controller, resistors, ignition, starter/generator, lights and signals, wiring harness, fuses and circuit breakers, switches, voltage regulator, charging port, ground connections, and color coding of wires.
- Safety Reminder: The article emphasizes the importance of safety when working with wiring and electrical components, advising consulting a professional if you’re not experienced.
This article is a comprehensive resource for anyone looking to understand or work on the electrical system of Club Car DS golf carts, covering a wide range of models and years.
Club Car DS Wiring Diagrams – Electric Models
Club Car Wiring Diagrams DS 1981-85 Electric Golf Cart 5 Solenoid Type
Club Car DS 1986-94 Electric 5 Solenoid Type Wiring Diagram
Remember that working with wiring and electrical components can be dangerous if not done correctly. If you’re not comfortable or experienced with this kind of work, it’s best to hire a professional.
Club Car DS 1995-2002 Electric 36 Volt V-Glide External Resistor Type Wiring Diagram
Club Car DS Wiring Diagrams – Gas Models
Club Car Wiring Diagram DS 1984-1985 Gas Model

There was a small change in the Limit Switch Wiring for later models of the same year.
Club Car DS 1986-1990 Gas Model Wiring Diagram
Club Car DS 1991 – 1997 Gas Model Wiring Diagram
Club Car DS 1998 – 2011 Gas Model Wiring Diagram
Key Terms In Diagrams
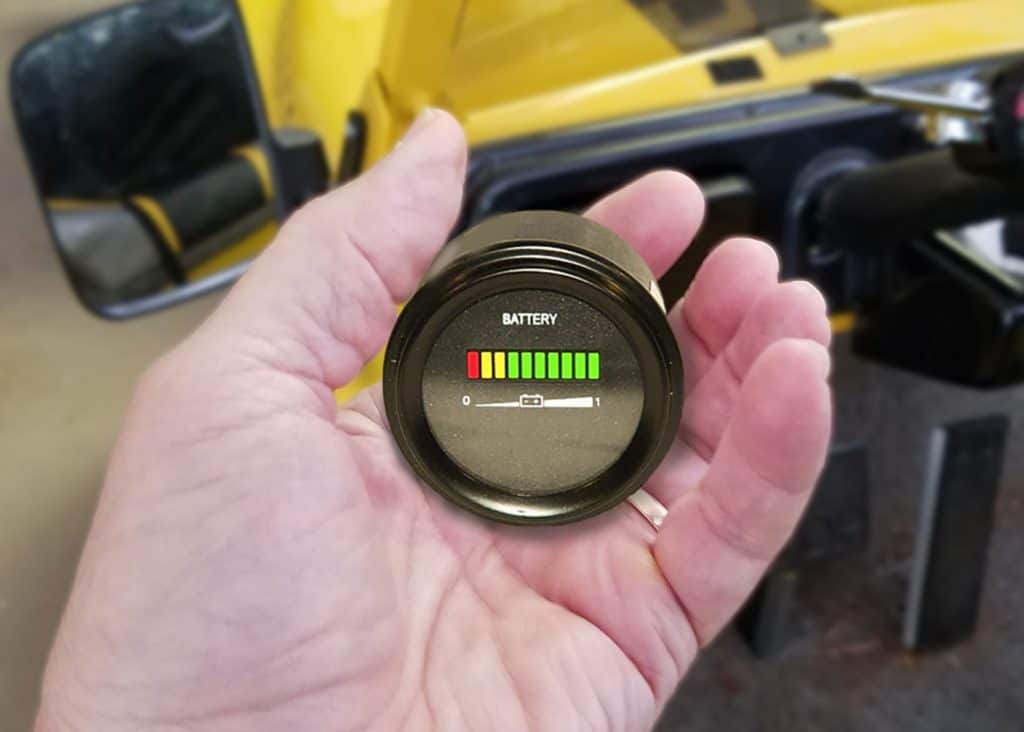
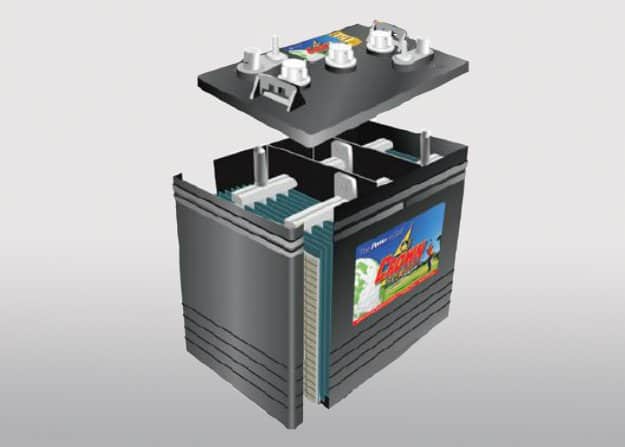
- Battery: The power source in electric models, often depicted with its voltage and connection points.
- Solenoids: Act as switches in the electrical system, crucial in both gas and electric models.
- Motor: The primary driving component in electric models, with connections often detailed in the diagrams.
- Controller: Regulates speed and power in electric models, interconnected with the motor and battery.
- Resistors: Used in some electric models for controlling current flow, depicted in older Club Car DS models.
- Ignition: Key component in gas models, connected to the starter and battery.
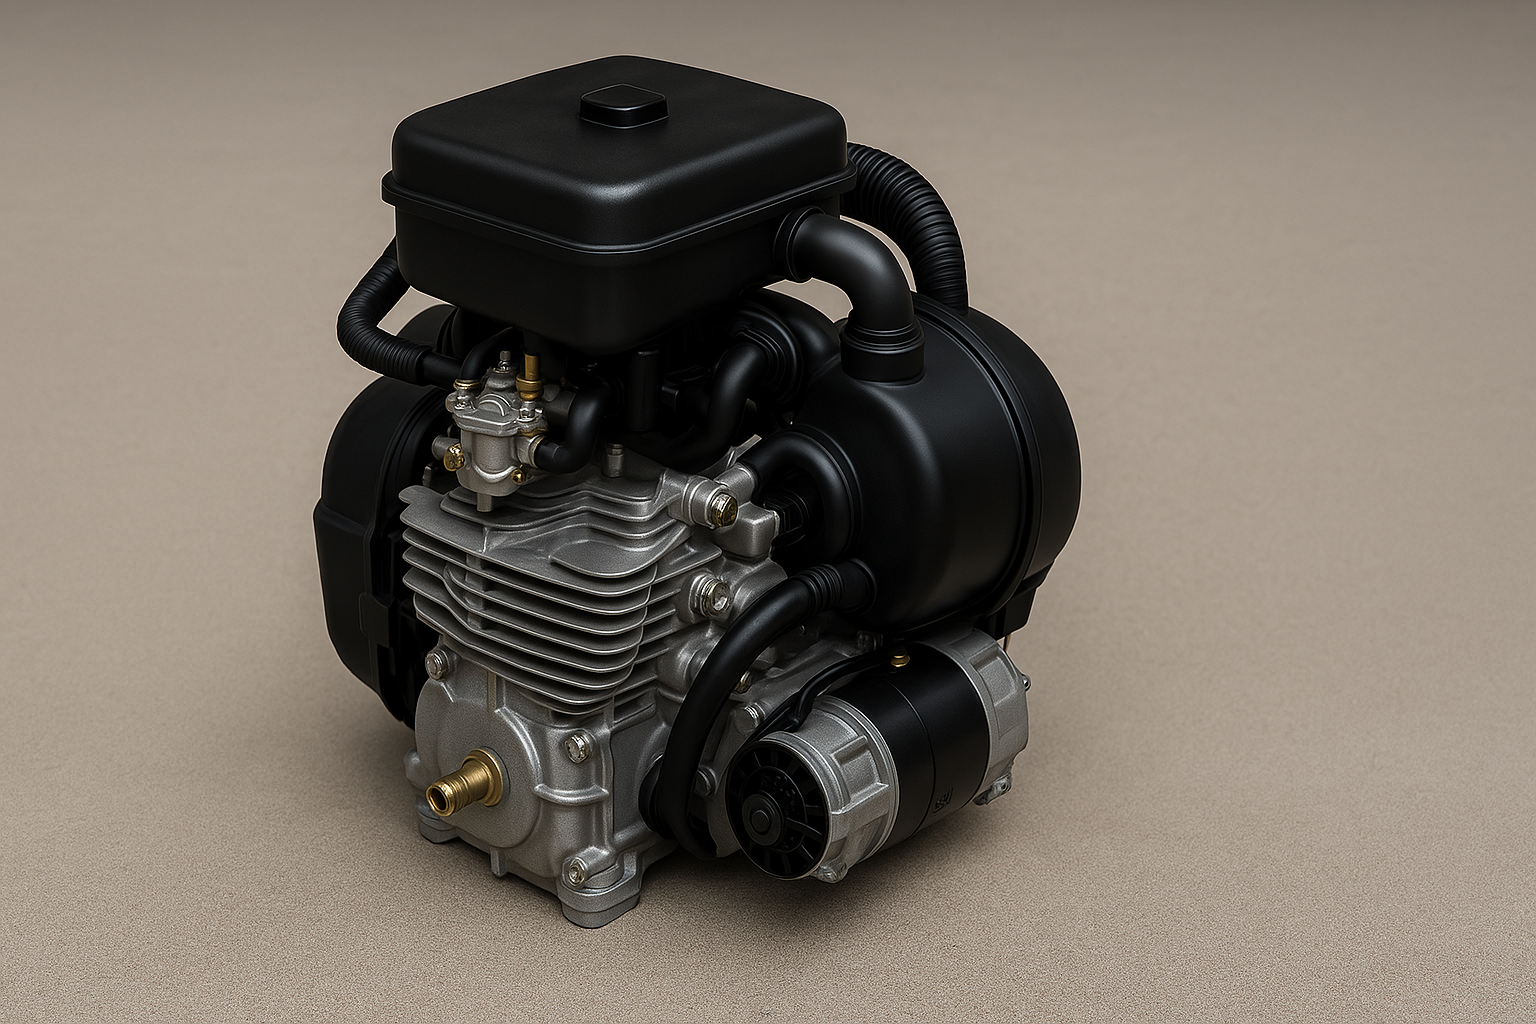
- Starter/Generator: Present in gas models, shown with its wiring to the battery and ignition system.
- Lights and Signals: Includes headlights, taillights, and turn signals, if applicable.
- Wiring Harness: Shows the complete network of wires, their routing, and connections.
- Fuses and Circuit Breakers: Safety devices to prevent electrical overloads, depicted in their respective locations.
- Switches: Includes key switch, forward/reverse switch, and other control switches.
- Voltage Regulator: In gas models, regulates the voltage to the battery from the generator.
- Charging Port: In electric models, the connection point for charging the battery.
- Ground Connections: Indicates where various components are grounded in the vehicle.
- Color Coding: Indicates the color of wires for easy identification and troubleshooting.

