
Introduction To How To Paint A Golf Cart
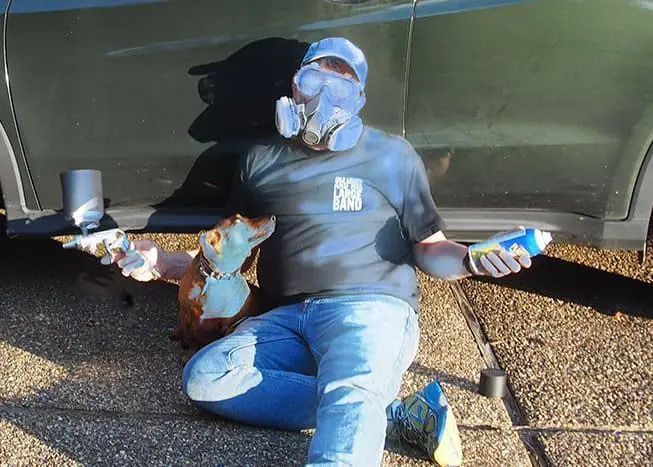
As a fellow golf cart owner, I understand how fun it can be to give your old golf cart a whole new look with a custom paint job! When I decided to paint my cart, I did tons of research to make sure I used the proper techniques and materials for the best, longest-lasting results. In this article, I’ll share with you everything I learned so you can paint your golf cart like a pro too.
First, you’ll need to select the right type of automotive paint – I chose a high-quality enamel paint known for its durable, glossy finish and resistance to chipping, fading and UV damage. Be sure to get primer as well, which helps the paint stick to surfaces like plastic and metal.
I’ll provide tips on proper preparation using sandpaper to scuff up the body, masking tape to protect areas you don’t want painted, and applying the primer evenly. Taking these vital steps ensures maximum paint adhesion and protection.
You’ll also learn techniques for painting your cart, like using smooth brush strokes, allowing adequate drying time between multiple thin coats, and finishing with a clear coat for extra resilience. I’ll share the tools and supplies that worked best for me too.
By the end, you’ll have the confidence to unleash your creativity on your golf cart with a stunning DIY paint job. Let’s get started with why a fresh coat of paint is so beneficial for both the look and longevity of your cart!
Key Takeaways
Why Spray Paint A Golf Cart?
There are many great reasons to give your golf cart a fresh coat of paint! Here are some of the key benefits:
Customization – Painting allows you to personalize your cart with fun, unique colors and designs. You can match the paint to your personality or style.
Protection – The right automotive paint, like durable enamel or urethane paints, provides a protective barrier against sun damage, weathering, and normal wear and tear. The paint forms a protective seal against rust and corrosion.
Improved Appearance – Over time, your cart’s factory paint job can start to fade, chalk, or yellow. A new paint job makes the cart look fresh and new again by restoring color vibrancy. It brings back that showroom shine!
Increased Value – A professionally painted golf cart often boosts the value over a factory painted one when it comes time to sell or trade it in. A custom paint job shows you’ve taken great care of it.
Curb Appeal – A gleaming new paint job grabs attention out on the course or neighborhood. It gives your cart visual appeal and “wow” factor.
Durability – Quality automotive paints like enamels stand up to frequent use and exposure better than factory finishes. Your paint will last longer and better resist scratches or chips.
So both aesthetic and practical reasons make golf cart painting a worthwhile endeavor. Your cart will look amazing while the paint protects the body and chassis underneath!


Preparing Your Golf Cart for Painting
Preparing your golf cart properly before painting is crucial for ensuring the paint adheres correctly and lasts. Here are the key steps:
- Preparing the painting area. Start with a well-ventilated area.
- You can make a paint booth by using inexpensive plastic sheeting or drop cloths from the local hardware store. Putting one layer on the floor will block moisture from the concrete and hanging other sheets around in an area roughly larger than the golf cart will protect from floating debris. The three issues we’re trying to avoid here are running paint from spraying too close, moisture in the color causing improper adhesion, and dust particles marring the finish.
- Clean the cart body thoroughly with soap and water or a degreaser to remove built-up dirt, oil, grease, and grime that could impede paint adhesion.
- Use sandpaper to lightly scuff or “key” the existing paint surface. This roughens it up so the new paint has something to grip onto. Start with 150 grit sandpaper.
- Wash again to remove all sanding dust, then let fully dry. Any residue left behind will cause flaws under the new paint.
- Apply masking tape around any areas you want to protect like windows, lights, mirrors, windshields, seats, etc. Cover them with plastic sheeting too.
- Prime the surface using automotive primer designed for metal, fiberglass, or plastic. Primer helps provide uniform hold for the paint.
- Allow the primer to dry fully according to the manufacturer’s recommendations before painting.
Taking the time to properly prepare the golf cart ensures you’ll get great looking, long-lasting results from the fresh paint job. It establishes a clean foundation for the paint to adhere to.
Choosing the Right Paint for Your Golf Cart
Selecting the right type of paint for your golf cart project is an important decision. Here are the key factors to consider:
- Durability – Enamel and urethane paints are excellent choices as they provide a super tough, resilient finish built to withstand outdoor conditions. Look for automotive grade paint.
- Finish – Choose between gloss, satin, or flat based on your needs. Gloss offers the most shine and protection. Satin is a nice compromise between gloss and flat.
- Color – Pick exciting colors that fit your personality! Brighter pigments hold up better outside than pastels. Get samples to view colors in person.
- Surfaces – Ensure the paint is formulated to properly adhere to the golf cart’s metal, plastic, and fiberglass surfaces.
- Use – Determine how frequently the cart will be exposed to sun, rain, dirt etc. Frequent use calls for the most heavy duty paints.
- Brand – Trusted brands like Rust-Oleum, Krylon Fusion, and Dupli-Color offer quality aerosol and brush-on paints perfect for DIY golf carts.
Do some testing first on a small spot that won’t be obvious. And be sure to follow all label instructions for best results with your chosen paint. Take your time selecting the right product for a paint job that really lasts and looks amazing.
The Process of Painting Your Golf Cart
Embarking on the journey of painting your golf cart can be both exciting and a tad bit daunting. But worry not, because with the right approach, your golf cart will be flaunting a fresh, new look in no time! The process of painting isn’t merely about applying color; it’s a systematic approach that ensures your paint job is smooth, durable, and visually appealing.
Applying the Primer: The first step involves laying a solid foundation with a primer. This ensures that the paint adheres better and lasts longer. It’s crucial to choose a primer that is compatible with your chosen paint type to avoid any chemical reactions.
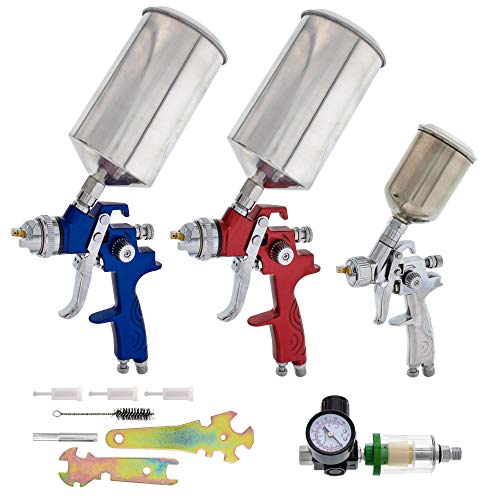
Painting Techniques: The actual painting can be done using various techniques. Spray painting is a popular choice for its even coats and professional finish. However, using brushes or rollers can also achieve unique textures and finishes. The key here is to apply even, consistent coats and allow ample drying time between them.
Applying Clear Coat
Once your paint has dried and cured, applying a clear coat is vital. This step provides an additional layer of protection and enhances the gloss and depth of the color. It shields the paint from UV rays, weather conditions, and everyday wear and tear.
Safety Precautions: Throughout the process, ensuring your safety and the safety of those around you is paramount. Utilizing masks and gloves, ensuring proper ventilation, and protecting surfaces from overspray are crucial steps in a safe painting process.
In each step, patience and attention to detail are your best friends. So, take your time, enjoy the process, and watch your golf cart transform before your eyes!
Maintaining Your Golf Cart’s Paint Job
Ensuring that your golf cart’s fresh coat of paint remains vibrant and durable over time requires consistent care and strategic maintenance. The longevity and aesthetic appeal of your golf cart’s paint job are not only pivotal for visual appeal but also for providing ongoing protection against various elements.
Regular Maintenance Tips: Implementing a routine of regular washing and waxing plays a crucial role in maintaining the paint’s luster and preventing build-up of dirt and grime. Utilizing microfiber cloths and automotive shampoos can help preserve the integrity of the paint and clear coat.
Dealing with Wear and Tear: Over time, your golf cart may experience chips, scratches, or fading. Employing touch-up paints and scratch removers can assist in mitigating visible damage and preventing rust or further peeling.
Ensuring Longevity of the Paint: Protecting your golf cart from harsh weather conditions by using a quality cover or storing it in a sheltered area can significantly enhance the lifespan of your paint job. Moreover, periodic inspections and minor touch-ups can keep the paint looking fresh and vibrant.
In essence, maintaining your golf cart’s paint job is an ongoing task that, when executed effectively, ensures that your vehicle remains a vibrant and protective mode of transportation for years to come. So, embrace these tips and keep your golf cart shining bright on the course!
Creative Ideas for Custom Golf Cart Designs
Unleashing your creativity onto your golf cart can transform it into a unique, eye-catching vehicle that’s bound to turn heads wherever you go. Customizing your golf cart with inventive designs not only elevates its aesthetic appeal but also gives it a personal touch that mirrors your style and interests.
Inspiration for Creative Designs: Drawing inspiration for your golf cart can stem from various sources, such as your favorite sports team, a beloved movie, or even a particular aesthetic like tropical or retro vibes. Incorporating decals, stickers, or hand-painted murals can add a distinctive flair to your vehicle.
Implementing Custom Designs: The implementation of your chosen design should be executed with precision and care. Employing stencils for intricate patterns, utilizing tape for creating clean lines, and choosing the right paint types for specific designs are pivotal in bringing your vision to life.
Showcasing Examples and Ideas: From a classic, sleek black look with minimalistic white stripes to a vibrant, multi-colored palette that reflects a lively spirit, the possibilities are endless. You might opt for a serene beach theme, a bold geometric pattern, or even a tribute to your favorite pop culture icon.
Remember, your golf cart is a blank canvas, and your designs are a reflection of your personality and creativity. So, dive into the world of colors and patterns, and let your golf cart be a moving piece of art that showcases your unique style!

Leave a Reply