Want to learn How To Wrap A Golf Cart? Golf cart wraps are a low-cost alternative to painting and provide the means of putting graphics on your ride with an almost limitless variety of designs. You can get a custom look with a pre-cut kit or get some solid color/graphic design vinyl materials and custom fit it to your own liking. Wrapping golf carts could change their personality overnight!
Is it easy to wrap a golf cart? Yes, using a few common tools and these simple steps will transform your cart into a work of art and the envy of the golf course. Now you can put a full wrap on your Club Car, Yamaha, E-Z-GO, Polaris, Garia, or any other brand of golf cart very inexpensively.
Why A Golf Cart Wrap?
Aside from vehicle wraps having a lot more options than spray paint, there are a lot of reasons to choose to wrap your golf cart rather than painting it. Here are 8 of those reasons…
1. Cost – How Much Does It Cost To Wrap A Golf Cart?
If you are having the golf cart painted, wrapping the golf cart will come out cheaper. If, however, you were painting it yourself, a good quality job with multiple coats and clear coat finish will cost about the same. The wrap will last longer in most cases and costs between $150 and $350. Partial wraps are also available if you don’t want to cover the entire cart with a solid color or design. It is an easy way to get fast results.
2. Protection
Vinyl wraps will not damage the painted surface of your golf cart, and if the paint is factory paint, the wrap will protect the surface and preserve the quality of the paint underneath. When the wrap is removed properly, the vinyl won’t leave any residue or peel any paint or clear coat with it. This is a big plus if you ever change your mind and want to go back to the original look.
3. Time
Painting a golf cart usually requires a little time to remove the old base color paint, mask, prep the surface, and paint each coat, waiting for drying time in between. This can literally take from 3 days to 2 or 3 weeks, not to mention the long time required for it to dry enough to take on the road.
Installing a wrap on your golf cart should take around 3 or four hours or an afternoon.
4. No Special Equipment Needed
Instead of a compressor and a spray gun, the most technical piece of equipment will be the heat gun. I happen to have a heat gun in my garage, but if you don’t have one and don’t want to spend the cash, a good hair dryer will suffice. The heat gun serves two purposes: to heat the vinyl so it can be stretched over the curved surface and to activate the adhesive to keep it in place.
Aside from the tools that are listed below, all you really need is the help of a friend to guide the really wide pieces into place and apply equal stretching pressure for the opposite end… something that’s not easy to do by yourself.
5. Long Life
Although some brands tout a 10-year life span for their products, a more sensible time frame would be around 7 years before there is a noticeable change in the color or gloss of the wrap. The surface underneath will be preserved from the ultraviolet rays and weather. Most manufacturers use UV-resistant inks to prevent your golf cart body from fading in the sun.
6. Safely Removable
Wraps are completely removable. Products such as 3M brhttps://www.3m.com/and adhesive assure your graphics won’t be peeling off unless you want them to.
7. High Resale Value
Wrapping a golf cart obviously makes the appearance much nicer and improves its resale value. Quite a number of people are running youtube channels showing them wrapping a golf cart with a high-quality wrap and then reselling them for double what they paid. It takes no stretch of the imagination to see that your shiny newly-wrapped golf cart is going to look like a diamond compared to the way it looked with a dull lifeless finish.
8. Customization
Custom golf cart wraps come in many solid colors, custom graphics, textures, and faux finishes. From snakeskin to a carbon fiber body kit, from shiny metallic to camouflage, from sandstone to color change wrap, the sky’s the limit.
Taking your creative vision to the next level can be achieved by finding the different patterns, surface gloss, and color varieties offered by large sections in roll form. The sections are cut into large super thin pieces, then stretched and formed around the body panels.
Amazon offers golf cart skins from AMRRacing that are digitally printed with UV-resistant inks that are guaranteed not to fade for up to 5 years. The design colors are the best in the industry.
A 3M brand adhesive provides a superior, durable, and long-lasting treatment and a thick layer of clear wrap vinyl over laminate provides great protection from scratches. Golf cart graphics kits are available for Club, Yamaha, and EZGo golf carts.
Tools
A list of tools to do the job right:
- Paper towels
- 70% Rubbing Alcohol and Simple Green Degreaser (or equivalent)
- (Optional)3M Brand Adhesive Promoter Pad (Optional, but is handy for applying in nooks and crannies)
- Masking Tape
- Cotton Application Gloves
- Heat guns
- Snap Blade Knife
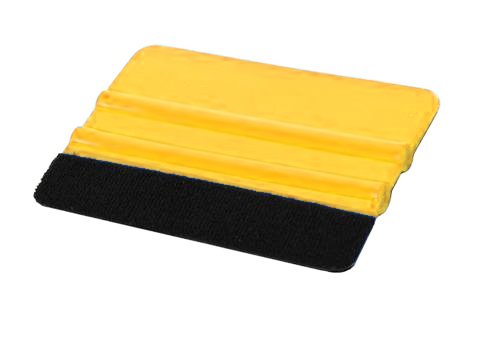
- Squeegee Tool
- (Optional) Knifeless tape
Knifeless Tape consists of carrier tape and an invisible high-strength filament which together are extremely flexible and turn smoothly along contours and edges of surfaces. The vinyl graphics wrapping film is placed over the tape and cut by pulling the filament through the film for a clean line.
How Do You Apply Vinyl Wrap To A Golf Cart?
Cart Preparation
Strip down the cart removing all of the hardware, lights, lenses, and other attachments that might get in the way. Remove the windshield and the top and get the golf cart stripped of anything that is not to get wrapped as much as you can.
Sand down any rough spots or gouges on the original finish of the entire vehicle. Try to get the surface as close to level as possible, remembering that dimples or bumps WILL show in the final product.
Fill holes with Duraglas or Bondo Glass Filler and sand them smooth. Follow all directions that come with the product you choose to use.
Applying The Wrap
Start with the back of the cab first (the part behind your legs when you’re driving) because this is normally the largest flat spot on the vehicle. This is usually the easiest place to cover and will allow you to get used to the feel of stretching the vinyl. Mark the middle with a small piece of masking tape.
If you are using a bulk roll of vinyl, measure the area to be covered and cut it larger than the size you need. TIP: Always cut about 20% more material than you think you’ll need – any excess is easy to trim once the film has been applied. It is better to have a bit too much vinyl than too little to finish the job.
Test position the vinyl and use the masking tape to make an alignment mark to match up with the mark on the body. Once you are satisfied with the position, tear a strip of paper from the middle of the panel paper backing. Use this exposed part of the vinyl to make the initial attachment to the surface once you have lined up with the pencil mark. the adhesive won’t stick until you apply pressure, so here’s your chance to get it in exactly the right place.
While you and your partner are stretching the vinyl away from each other, peel the backing paper off the vinyl as you smooth it onto the surface. Use the felt-covered squeegee and/or cotton-gloved hand to smooth the bubbles out of the film as you apply heat from the heat gun and work your way to the outside edges. If you are using a heat gun and not a hairdryer, be cautious about the distance away from the film. A heat gun is considerably hotter than a hairdryer.
Anywhere there’s a protrusion, such as a key switch or reverse/forward knob shaft, use the razor knife to cut a relief slit large enough to allow the film to pass over it. You will come back later and trim this properly using the knife and squeegee to make it tight fit around the hole or protrusion.
Use the heat gun over the surface to activate the adhesive while smoothing and turning corners. At the tops of the surface corners, make a slit in the film, trim, and fold the remainder over. Seal it with the heat gun and repeat on the other side. Tuck all the edges in and inspect your work. When you are satisfied with the look, heat the area again to set the adhesive and relieve any remaining tension. Any mistakes you made getting the edge wrapped over will show up at this point. If an edge curls up, or any wrinkles appear, rework this area.
This video is an excellent example of developing a smoothing/stretching technique to get a professional look.
Once you are happy with how the area looks, move on to the other sections of the golf cart. A great deal of your success will be due to you developing your technique with the squeegee. On a flat surface, for example, you’d be moving it from top to bottom to remove all the bubbles and wrinkles. Over a rounded, curved surface, you will want to use an arced sweep of the squeegee to prevent “bottle-capping” or small groups of wrinkles. Again, remember to save all the scrap pieces as you might need them later for patching or a detail part.
In the places where a seam is unavoidable, overlap the joint and use a knife or knifeless tape to make a clean cut so the edges can butt closely together.
Final Thoughts
Vinyl wraps were never meant to be permanent. If you own the golf cart long enough to need to replace the vinyl wrap, you can use heat to pull up the wrap. Once the wrap is removed, use Goo Gone or some other citrus-based chemical to dissolve and remove excess adhesive from the golf cart body.
Golf Cart Wrap Ideas
Pre-Cut High-Quality Wraps And Decals


Mossy Oaks Graphics has dozens of color choices in this full-wrap kit. Check out the variety they have to choose from.
Classic subdued flag design – Compatible with E-Z-GO RXV 2008-2015
Bulk Vinyl Wrap Film By The Roll

- Precision cut for a professional finish. Easy, do-it-yourself installation! Guide included
- Triple Layered Vinyl with a Clear Protective Layer, a Vividly Printed Design, and a Strong Adhesive Backing
- Clear Overlaminate for Polished Armor like Layer of Protection