When you tune up a club car, you are performing a vital step in maintenance. Keeping a golf cart in good condition helps it run better and last longer. If you own a Club Car Precedent or an older model, knowing how to maintain your cart can save you time and money.
Key Takeaways
- To keep your Club Car running well, make sure to get an annual tune-up and regular checks.
- Self-Service: With the right tools and guidance, many tune-up tasks can be DIY.
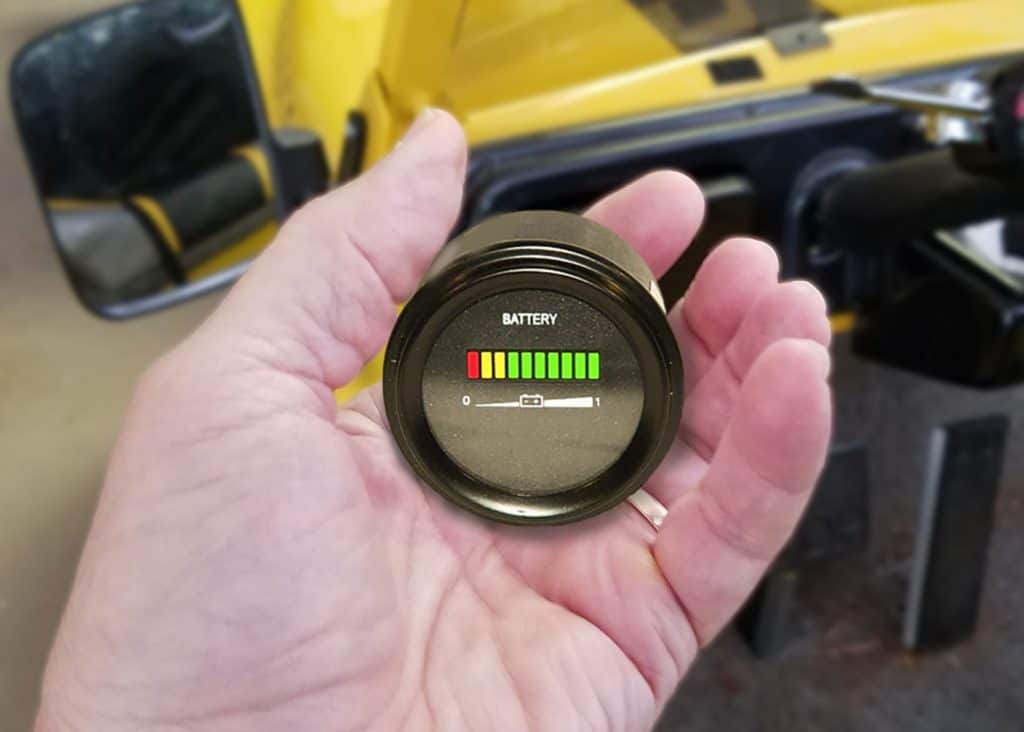
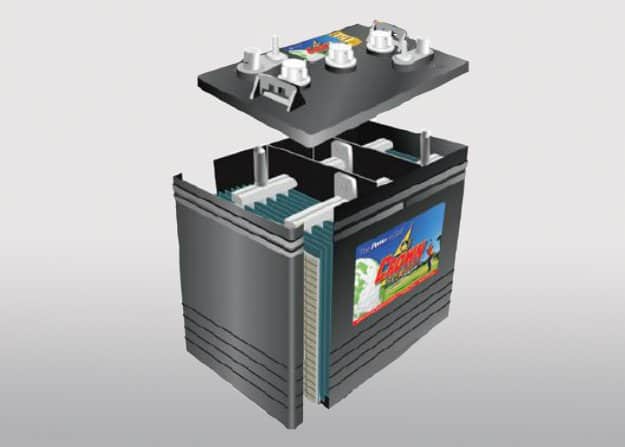
- Battery Care: For electric models, battery maintenance is essential for longevity.
- Keep a log of maintenance tasks to track your cart’s health and preserve its value.
- Professional Help: When in doubt, seek professional assistance to avoid costly mistakes.
Checking and Replacing the Spark Plug
One of the first steps in a club car tune-up is to inspect the spark plug. A worn or dirty spark plug can lead to engine misfires and reduced performance. Make sure to remove the plug , check its condition, and test for any wear or deposits. If necessary, replace it with a new one to ensure your vehicle runs smoothly.
Air Filter Maintenance
The air filter is crucial for maintaining clean airflow to the engine. A clogged or dirty filter can impede performance and cause the engine to run rich. Regularly check the air filter and replace it if you notice any blockage or damage. This simple step can significantly impact the efficiency of your gas golf cart.
Fuel System Checks
To prevent blockages in the fuel system of gas models, it is important to keep the fuel filter clear. A blocked fuel filter can cause your cart to stutter or stall. During a tune-up, check the filter and replace it if needed. Additionally, inspect the fuel lines and carburetor for any signs of wear or leaks.
Listening for Engine Irregularities
While the cart is running, listen for any unusual noises. Odd sounds can indicate a range of issues from loose wires to internal engine problems. It’s important to address these sounds promptly to prevent further damage.
To improve your golf cart’s performance and lifespan, make sure each part is in good condition.
Drive and Belt Inspection
The drive system of your club car is integral to its operation. Regular inspection of the drive belt for any signs of wear, such as cracks or fraying, is crucial. A compromised belt can affect the cart’s performance and might even lead to a breakdown. If the belt appears worn, replace it to maintain the vehicle’s integrity.
Carburetor Adjustment for Optimal Performance
The carburetor is the heart of your golf cart’s fuel system. It mixes the gas with air to create the combustible mixture that powers the engine. The carburetor may need adjustment over time. This ensures the mixture stays at the best ratio. If you don’t know how to do it, ask an expert or use a guide for your car model.
Check the Air Flow
Start by raising the seat and gently lifting the cushion from the hinge brackets. This allows you to remove the seat by sliding the tab with two ears from the hinge slot. This is a feature I overlooked when I first got the cart. I didn’t realize I could easily remove the seat instead of propping it up with my elbow while I worked.
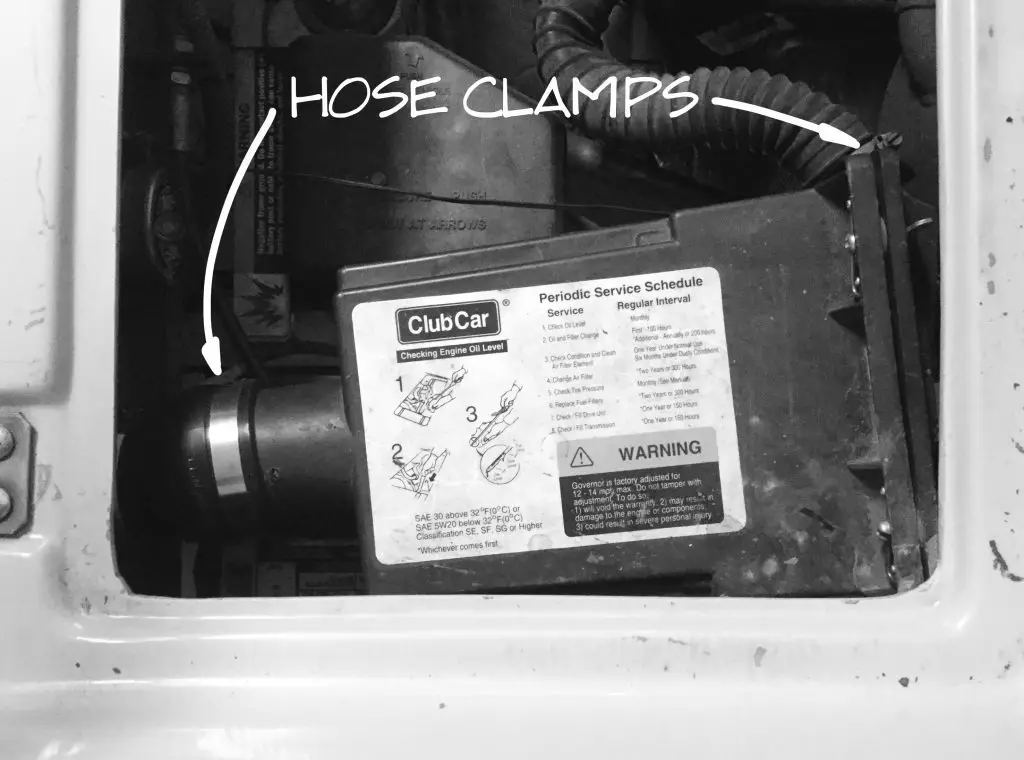
After setting the seat aside, identify the air filter box. For the 1992 – 1996 model DS Club Car with the FE290 Kawasaki engine, you’ll find this box on the driver’s side of the opening. It’s a black plastic box with two thumbscrews at the back. Simply rotate each of these 90 degrees to unlatch the back. If the box’s placement makes it hard to access the latches, you can take out the entire airbox. Do this by loosening the hose clamps at the front and back of the box.
To access the air filter box of a 1992-1996 DS Club Car with the FE290 Kawasaki engine, follow these steps. They are simple and straightforward. Not only does it save time, but it also ensures you can work comfortably without having to prop the seat up.
Check the Fuel
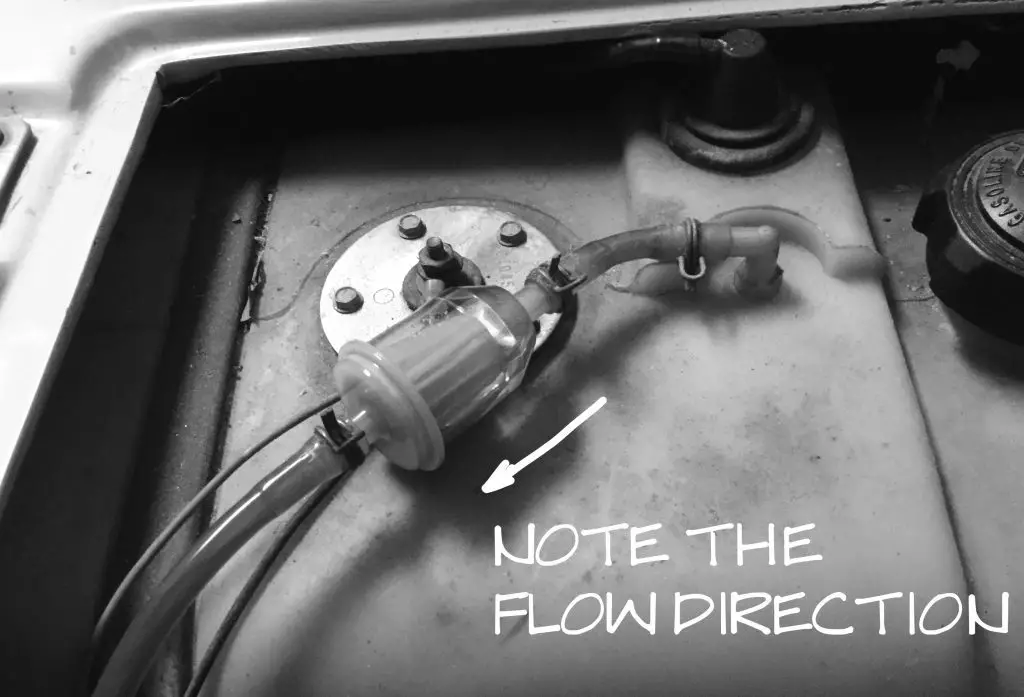
The fuel tank is on the passenger side of the engine well. It has a fuel filter on the fuel line leading to the carburetor. You can tell if the fuel is good or bad by looking at its color. Good fuel is light and clear, while bad fuel is dark and amber. If gasoline gets old, it loses its ability to burn and can clog the filter and carburetor.
Observing the Fuel Filter
The fuel filter should be positioned with the tapered end and flat end in a specific orientation. The fuel flow in this filter goes from the tapered end to the flat end – this is a critical detail to remember!
Checking Gasoline Quality
If the filter is opaque and you can’t observe the fuel, you can open the gas tank and check the gasoline there. The smell will tell you if it’s turning to shellac. If the gasoline is old or you’re unsure about its quality, use a hand pump to remove it. Then, replace it with fresh gasoline.
Detecting Blockages
Take off the filter from the line. Tap the back on a clean paper towel. If black, sludgy deposits stain the sheet, you’re likely looking at the cause of your cart’s poor performance. Sometimes there’s a second filter located under the carburetor. If you have one, check that it’s also clear of deposits.
Adjusting Air Mix and Throttle Screw
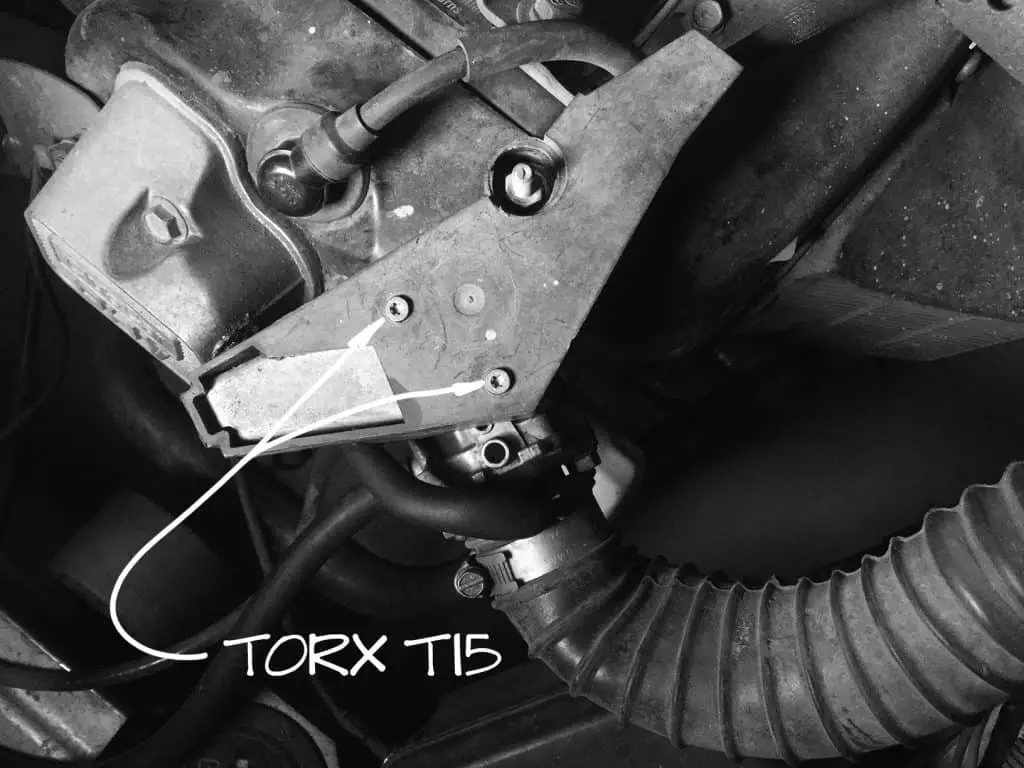
To adjust the air mix and throttle screw, use a Torx T15 to remove two screws. These screws secure the cover that hides the adjustments. After unscrewing, lift the right edge of the cover, pivot it over and remove it. To access the adjustment screws, use needle-nose pliers to remove the fuel line and exhaust vent tube.
Remember, maintenance and regular inspections are key to ensure your vehicle runs smoothly. If you follow these steps carefully, your engine will stay in good condition and last longer. Regular checks can help you find and fix problems early. This saves you time, money, and headaches later.
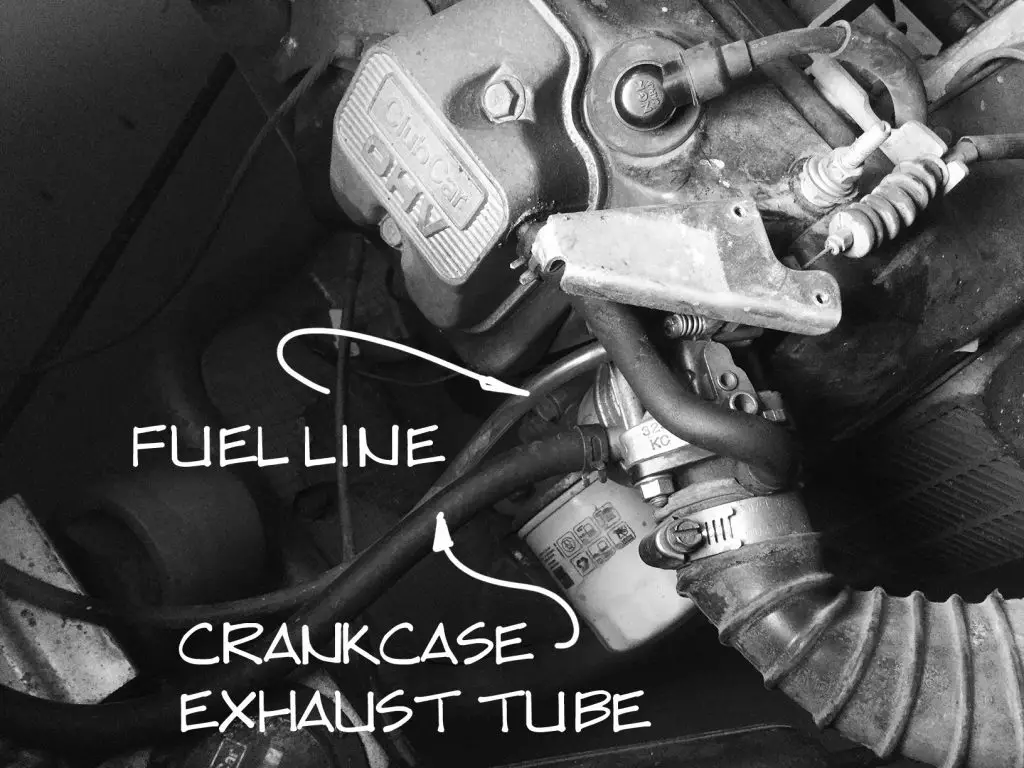
I found the exhaust vent tube on mine had been torn in half by the sharp edge of the cover sometime in the past. Luckily, the tube was long. We could cut off the damaged part and still reach the nipple.
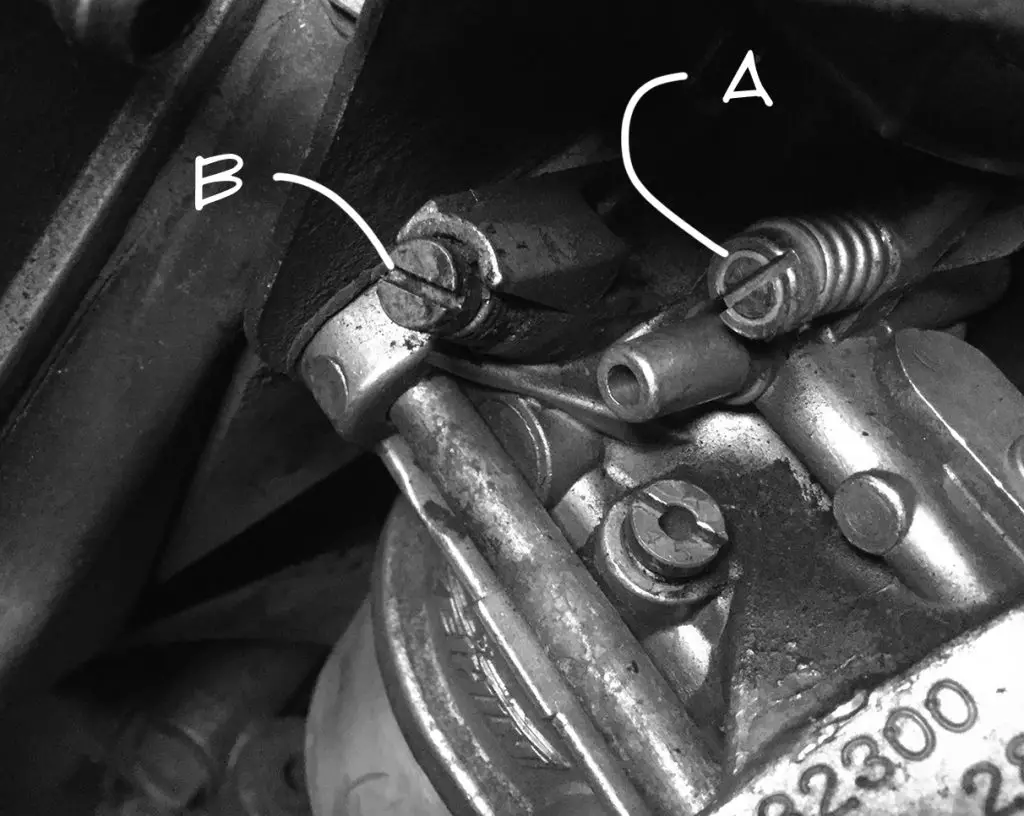
To adjust the throttle “A”, use a flat screwdriver to turn the screw away from the plate. Keep turning until there is a gap between the screw and the plate. Turn the screw until it touches the plate, then 1/4 turn further.
“B” is the air mix adjustment and this is set by turning it closed to a soft seat, then back it out 1-1/4 turns. Hook the fuel line and crankcase vent tube back up and replace the cover, tightening down the two screws.
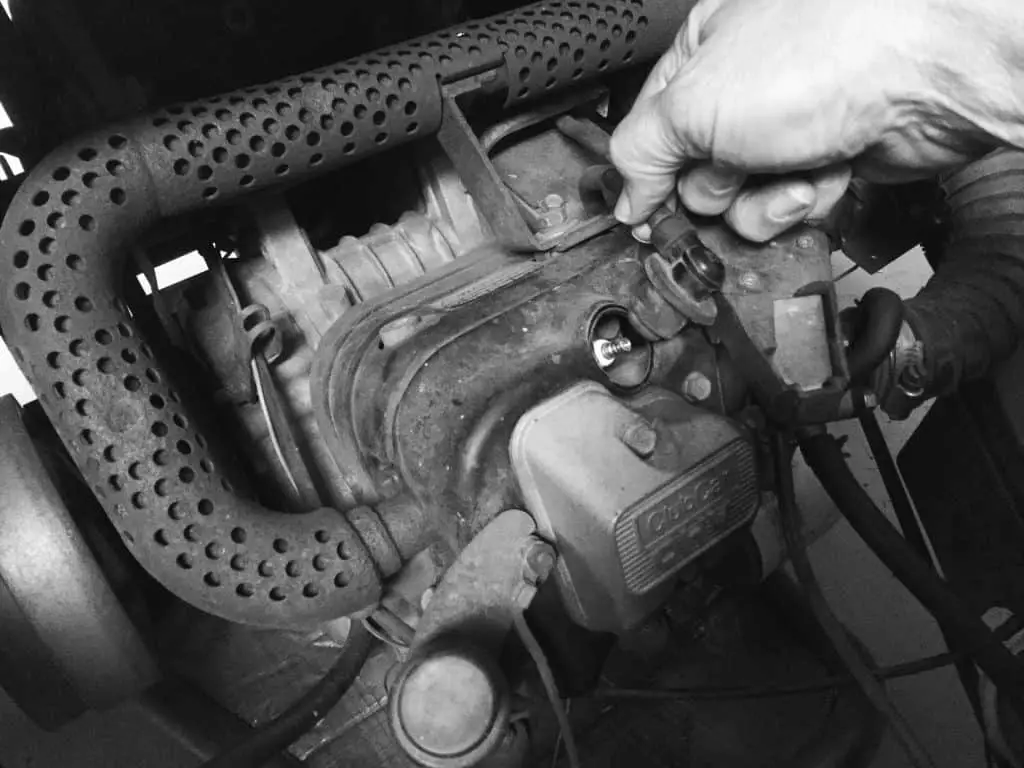
Locate the spark plug on the top of the engine and remove the cable, exposing the top of the plug. Use a spark plug socket and ratchet to remove the spark plug and inspect the ceramic insulator.
This should be light brown to brown and not oily or wet. If the color is black, you may need to adjust the air screw for the fuel mixture. The electrode should be visibly free of deposits and can be scraped clean if needed.
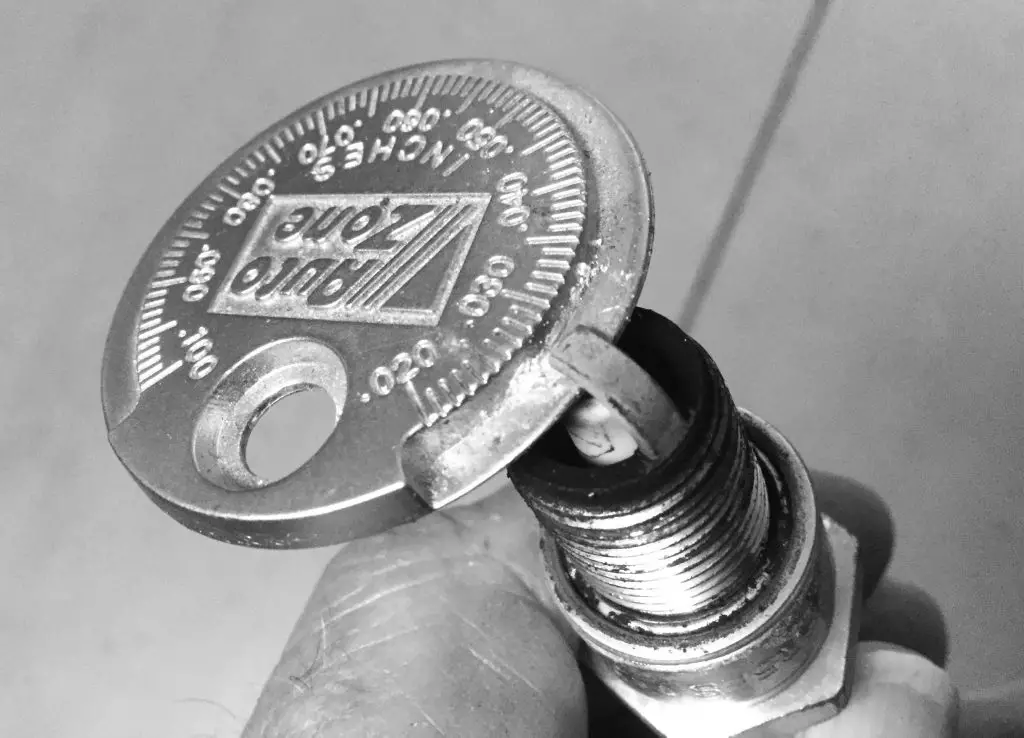
Check the gap with a spark plug gap tool (cheap or free at most parts counters) and set this gap to .028 – .030. To prevent cross-threading, use the socket and your fingers to screw the spark plug into place. Gently tighten using the ratchet. Don’t tighten too much to avoid stripping the spark plug hole on the engine’s head. Push the wire connector back on to the spark plug.

Ensuring Proper Electrical Connections
Electrical issues can often be traced back to loose or corroded wires. When you tune up your vehicle, be sure to check all electrical connections. This includes the battery terminals. Look for signs of corrosion or looseness. To make sure your cart starts reliably and stays powered, connections need to be clean and secure.
Testing the Vehicle’s Overall Condition
After addressing the spark plug, air filter, fuel filter, and carburetor, it’s time to test the cart. Place the vehicle in neutral and start the engine. Pay attention to how the engine sounds when it’s running smoothly and how it feels when you speed up. This test can show if you need more adjustments or if your tune-up worked.
To keep your club car golf cart running well, follow these maintenance steps. This will make sure you have a smooth drive on the golf course or neighborhood paths.
Regular Oil and Filter Changes
An often overlooked aspect of maintenance is the regular changing of oil and filters. For gas golf carts, this is as crucial as it is for any vehicle. Old oil can lead to engine wear and reduced efficiency. During your tune-up, you should drain the old oil. Then, replace the oil filter. Finally, add new oil to your Club Car engine according to your car’s specifications.
Inspecting and Maintaining Tires
Your cart’s tires are the only things that touch the ground. Their condition affects ride, safety, and fuel efficiency. Make sure the tires are properly inflated, check the tread for wear, and look for any damage. Properly maintained tires can also reduce strain on the cart’s drive system.
Checking the Braking System
Safety is important. The braking system is a key safety feature on your golf cart. Inspect the brakes for wear and ensure that they are functioning correctly. If you see any problems or the brakes don’t work as well, you might need new brake pads or a brake service.
Cleaning and Protecting the Cart’s Body and Seats
The aesthetic appeal of your club car is just as important as its mechanical integrity. Clean the body and cover it to protect against the elements. To keep the seats looking new and comfortable, clean and condition them properly.
Final Thoughts on Club Car Maintenance
A good tune-up improves your club car golf cart’s performance and helps it last longer. To keep your cart in good condition and fun to use, follow a detailed maintenance checklist. Take care of each area.
After the tune-up, your club car is in great condition. You can drive confidently on or off the golf course.
FAQs
How often should I tune up a Club Car golf cart?
Regular tune-ups are recommended at least once a year or every 250 hours of operation. However, this may vary based on usage and model specifications.
What are the signs that my Club Car needs a tune-up?
Common signs of a problem are hard starting, uneven idling, less power, and strange noises.
Can I perform a tune-up on my Club Car by myself?
Yes, with basic mechanical skills and a set of instructions, you can perform a basic tune-up. However, for more complex tasks or if you’re unsure, it’s best to consult a professional.
What is the most important aspect of a Club Car tune-up?
To keep the engine running well, it’s crucial to maintain clean air and fuel filters.
Do electric Club Cars require less maintenance than gas models?
Electric models need less engine care, but focus on the battery and electrical system.


Leave a Reply