So, how can you check if your golf cart solenoid is bad? By using a multimeter you can zero in and fix it fast by checking continuity on fuses and solenoids.
Have you ever had trouble with your golf cart not working? Well, one common problem might be a bad golf cart solenoid. But what exactly is a solenoid? A solenoid is like a switch that controls the flow of electricity in a golf cart. If the solenoid is not working properly, your golf cart won’t turn on when you press the accelerator.
Simple Steps To Follow
Step 1: First, check the voltage of the battery. A 12-volt solenoid needs between 12-18 volts to work properly. If the voltage is too low, the solenoid won’t activate.
Step 2: If the voltage is low, check the battery cables for any dirt or corrosion. Clean them up and make sure the battery is charged.
Step 3: Check all the connections to the solenoid and make sure they are clean and tight.
Step 4: To check if the control voltage reaches the solenoid, use a tool called a multimeter. If the voltage is too low or not present at all, it could be because of a blown fuse or loose connections.
Step 5: If the solenoid doesn’t click or let electricity pass, try a bench test. This means taking the solenoid out of the golf cart and testing it separately.
The solenoid in a gas golf cart is like a switch. It protects important parts from damage by controlling electricity flow. In an electric golf cart, the solenoid also helps with moving the cart forward and backward.
To fix issues with your golf cart solenoid, you need to know how it works. So, the next time your golf cart isn’t working, don’t worry! Just follow these steps and you’ll be back on the road in no time.
What Are The Symptoms Of A Bad Solenoid In A Golf Cart?
If your golf cart is not starting, there could be a few different problems. If it runs on gas, the engine might not turn on. If it is electric, it might not move. Here are some other things to look out for:
- If the engine starts but the starter doesn’t stop, it could damage the starter, wiring, or flywheel. This happens when the contacts get stuck together.
- Sometimes, the golf cart solenoid makes a clicking sound and works, but other times it doesn’t. This could be because of a bad wire connection or a failing solenoid.
- If the solenoid doesn’t click when you press the accelerator, there might be a problem with the wiring or the solenoid itself.
- If the solenoid clicks but nothing happens, it could be because the contacts are burned or not touching each other properly. You might need to replace the solenoid. It could also be because the battery doesn’t have enough power to reach the solenoid.
Remember to check these things if your golf cart isn’t working properly.
How A Solenoid Works
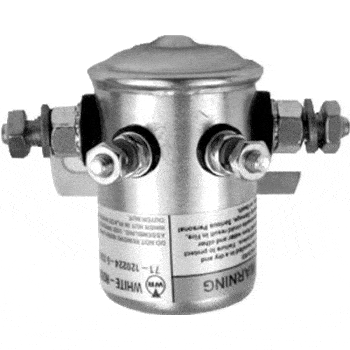
A solenoid is not exactly the same as an electromagnet, but it is similar. It is made up of a coil of wire, wrapped around a piece of iron in the shape of a rod. When you send electricity through the coil, it creates a magnetic field. This magnetic field makes the iron rod move inside the coil.
The purpose of a golf cart solenoid is to change electrical energy into mechanical energy. This is useful for making things like switches work. When the solenoid is powered, it creates a strong magnetic field that can attract a metal rod or plunger. This plunger has a plate attached to it, which presses against some internal contacts. When this connection is made, it creates a circuit and lets high voltage current flow. This current powers the motor or controller, starting it up.
When the power is switched off, a spring moves the plunger back and disconnects it from the internal contacts. This interruption stops the circuit. This is how solenoids help us control the flow of electricity to different devices.
What Does A Golf Cart Solenoid Do?
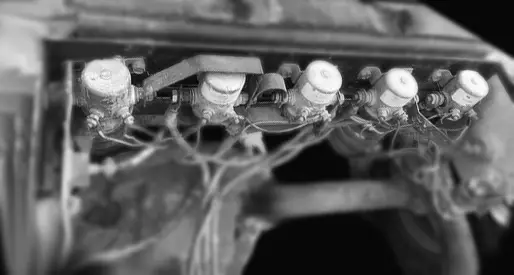
In the past, like the 1960s, solenoids were used in electric carts to control the flow of electricity. The resistors were important for changing the voltage and adjusting the motor’s speed. In those days, electric carts used a group of solenoids called a “solenoid bank.”
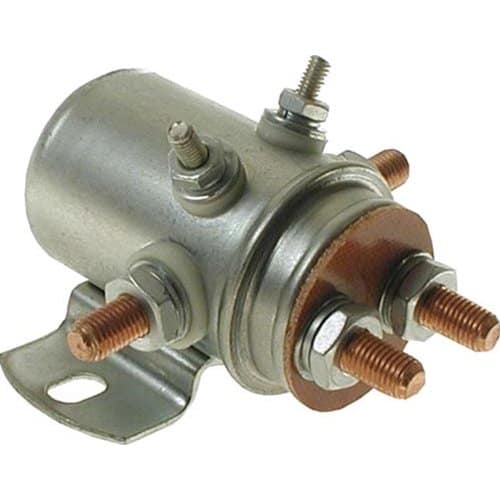
At first, single-action solenoids were used. These golf cart solenoids had four terminals and were responsible for redirecting the electrical power. But, as time went on, the industry introduced dual-action solenoids with six terminals. These new solenoids were able to do more things and were more efficient.
Below, you can see a picture of a golf cart solenoid bank.
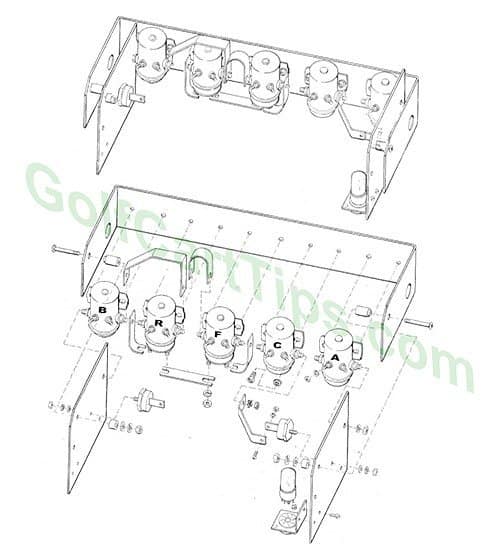
By combining different solenoids, the current was redirected to the motor. This was done by connecting two sets of 18-volt batteries in parallel. Then, a resistor was used to create a low speed. Then, redirect the current to bypass the resistor, resulting in a higher speed. You can connect two banks of 18 volts in series to get 36 volts for a different speed.
Golf Cart Solenoid Cutaway

Key to the Illustration Above
- Low voltage terminals. The terminal posts are at each end of the wire coil that wraps around the metal movable core.
- Movable Core. The object moves towards the electric field when voltage is applied to terminal #1.
- Wire Coil. When you apply low voltage to terminals #1, this part of the solenoid becomes electromagnetic.
- Large Terminals. When the core #2 moves up into the coil #3, the bottom plate touches the two terminals (shown with dashed lines). This creates a bridge for the current to pass through the solenoid.
- Lower Large Terminals. The solenoid has 6 terminals. The Lower terminals are bridged. They pass current when the solenoid is not energized. The contact is broken when the plate moves up to contact and bridge the side terminals #4.
Newer Electric Golf Carts
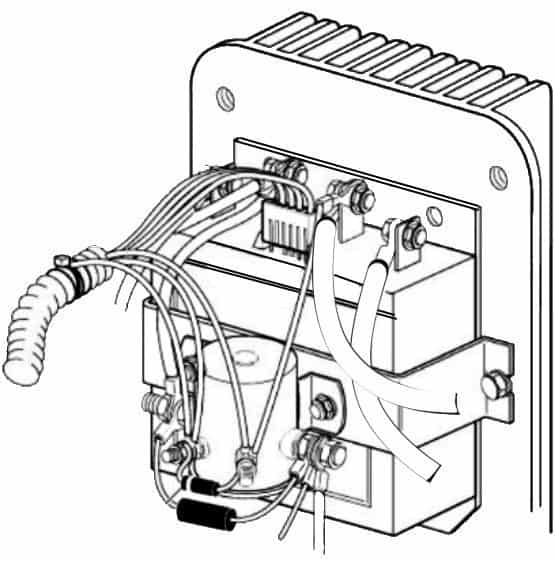
We can control electric motor speed using electronic speed controllers. A solenoid powers the controller. A microswitch and a stepping potentiometer regulate it.
An example of in-cart testing is the E-Z-GO Series Drive system. The solenoid test is done with the resistor removed from one large terminal. Always make sure that the side connected to the batteries has positive voltage. Also, set the cart drive to the neutral position.
When the small terminals have positive and negative voltage, the solenoid should CLICK. Full battery voltage should be present at both large terminals. If not, then the solenoid is faulty. If you push the pedal and there’s no voltage at the small terminals, there’s a problem with the golf cart solenoid circuit.
Tracing back on this circuit is simple using a wiring diagram. The switches are activated in a specific order. First is the Reed switch. Then the Forward and Reverse micro switch. Next is the key switch. Lastly, the Foot or pedal box switch. All of these switches must be working before the activation is delivered to one of the small posts (red wire).
Gas Golf Car Starter Solenoids
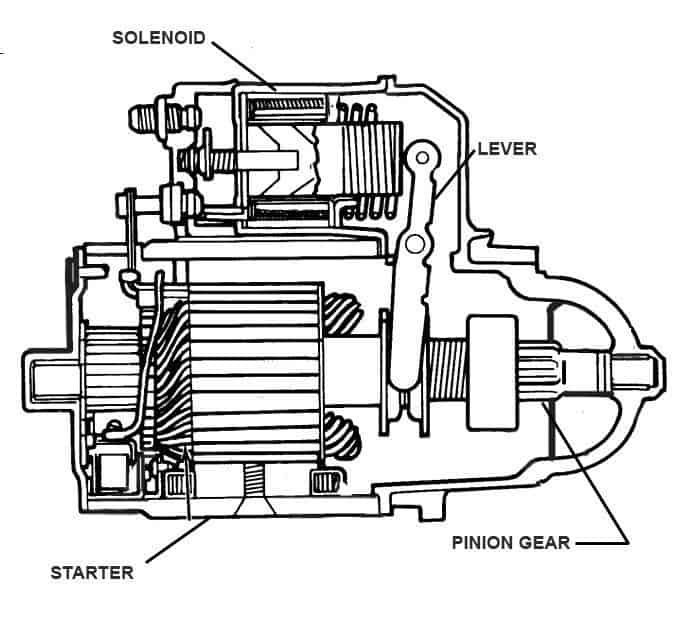
Automotive and gas-powered golf carts use variations of the illustration on the left. The solenoid’s low-voltage terminals receive power. The piston moves back and bridges the contacts. It also pulls back on the lever to engage the pinion gear.
On some models of golf carts, the starter is also the alternator and acts to charge the battery as the cart is driven.
Where To Find The Solenoids In A Golf Cart
You can find the solenoids in all golf carts, whether they are new or old. They are located under the seat or in the engine well. You can identify them by the wires that lead to them. The heavy duty solenoids, which are like the ones shown before, are mounted near the electric motor. They can be found on the side or back panel. On gas motors, they will be attached to the large starter/alternator bolted to the engine.
Newer electric golf carts, like the EzGo, have a separate compartment under the seat for the solenoid. To access it, remove the protective cover.
Troubleshooting A Golf Cart Solenoid
Tools Needed
- A Multimeter or Voltmeter
- 2 Wenches – usually a ½” or similar
- Gloves
- Electrical Tape
- Safety glasses
- A 12v power supply, such as a battery charger
How To Test The Golf Cart Solenoid Without Removing It
Before testing the golf cart solenoid, make sure to test the accelerator micro switch. Also, test the key switch. The control circuit of the solenoid has two components wired into it. If these components are faulty, the solenoid won’t work.
Turn the ignition switch on and press the accelerator. Do you hear a click? At this point, we still have to test the solenoid, but we know something…power is not activating the solenoid. With the pedal depressed, check the voltage at the small terminals of the solenoid. If there is no voltage, then the solenoid is NOT at fault. If there is a click, then…proceed to the next paragraph.
Disconnect the cables that go to the larger solenoid terminals. To prevent accidental shorting, wrap the ends of the cable with electrical tape. This will keep them from connecting to metal objects or touching each other. To prevent the vehicle from leaving during solenoid testing, make sure this is done.
Turn off the key and disconnect the cables. Set the voltmeter to ohms. Touch the probes to each large terminal. There should be zero ohms. If the reading is not zero, then the solenoid is stuck and needs to be replaced.
If the ohmmeter does read zero, set the cart to forward travel and turn the key switch on. Press the accelerator pedal (or have a friend do it) and you should hear a click. If you don’t hear a click, measure the resistance anyway. If it now shows resistance, where there was none before, it should be under 0.4 ohms.
If you do hear a clicking sound, and the reading is fewer than 0.4 ohms, but not zero, the solenoid is good. If the reading is higher, the solenoid is bad and needs to be replaced.
If you don’t hear a click or feel resistance, check the solenoid with a voltmeter. Set the voltmeter to DC volts, using the 200 range. Turn the key switch on and take a reading on the smaller terminals while pressing on the accelerator. If there is no voltage, the problem is not with the solenoid. If the solenoid displays full voltage, it is bad. Replace it with a new one from your golf cart parts supplier.
Bench Testing the Solenoid
Equipment needed to bench test:
- 6v or 12v battery with leads long enough to go from battery post to solenoid terminal.
- A battery-powered continuity tester (multimeter set to continuity will work)
On the double contact solenoids, check the bottom terminals for continuity. If the solenoid is not powered, the contacts should be closed and have a circuit. When a single or double contact solenoid is not powered, the side terminals should be open and show no continuity. Apply 6-12v to the smaller terminals using the leads from the battery. You should be able to hear a click when energized. If you hear a click, check the large side terminals for continuity. You should find a continuous circuit. The bottom terminals should not have any continuity. If you do not hear a click, the solenoid is bad and must be replaced.
One reason why solenoids often fail is because the terminals are not properly loosened or tightened. To attach the cable on the large terminal posts, you need two 1/2″ wrenches. Use one wrench to hold the nut closest to the solenoid body to keep it from twisting. Use the other wrench to turn the outside nut.
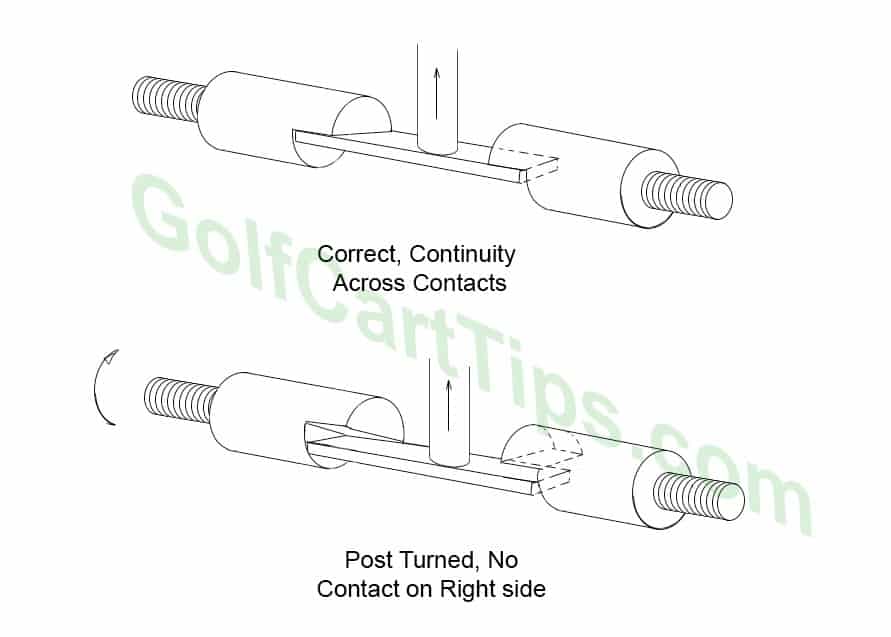
Below is an illustration of what happens when the contact is twisted and no longer aligned with the flat plane of the moving plate. The left side makes the smallest of surface contact and the right side can no longer make contact at all. You cannot use the solenoid until you realign it by trial and error. You can’t see inside.
Replacement
Ok, you have determined that you need to replace the solenoid. Many places carry replacements, like Amazon and eBay and run anywhere from $12 to $57 depending on the type. When you look for a replacement online, always have the make, model and year of your golf cart handy. Solenoids are inexpensive. Think about the money you saved by diagnosing it yourself. If you don’t know the model and year of your golf cart, don’t worry. This site has instructions to help you identify it.
How to Bypass a Solenoid
If there are issues with your golf cart’s wiring, you may need to join the solenoid’s bigger terminals. I suggest doing this only for testing, not as a long-term solution for your cart’s problem.
Here are some troubleshooting steps you can follow to bridge or jump a solenoid. They will help you find out if the solenoid is bad before you go through the trouble.
Safety First
- Raise the rear wheels off the ground using the proper support stands. Then you begin your solenoid testing.
- Get a fire extinguisher and keep it handy. YouTube has a ton of golf cart fire videos and you don’t want to be one of them.
- Higher voltage cars can cause severe burns and can occur by accidentally shorting out connections with metal objects.
- When testing solenoids, do it in a well-ventilated area and be extremely cautious near batteries. There may be hydrogen gas. Flames and sparks can ignite these gases
- Keep battery acid away from your skin and eyes as this can be an irritant.
If the solenoid is broken, you can bypass the key switch on a gas cart by using a jumper. This will spin the starter/alternator when the accelerator pedal is pressed. Attach a jumper wire with alligator clips to one large terminal. Carefully brush the other end on the remaining large terminal. If it sparks, note if the starter engages. Attach the wire to the large terminal. This bypasses the solenoid if there is no current present. With the key on, attempt pressing the accelerator and see if the starter engages.
If the starter doesn’t engage, it means the solenoid is either bad or not getting control voltage. You will need to test the voltage across the small terminals to determine which case is true.
To bypass the solenoid, remove the cables connected to the large terminals and join them. I recommend yanking the jumper off the contacts to break the connection.
If this is an electric cart, the solenoid supplies power to the controller. Jumpering the large terminals allows the pedal to rev the motor up to speed. This works as long as the solenoid is the problem.
How to Test A Golf Cart Solenoid Diode
Some of the late model golf cart solenoids have a diode attached across the terminals. A diode allows the current to run in one direction, but not in the other. Testing the diode is a simple procedure. Remove the diode from the circuit and check the leads with a continuity tester. Reverse the leads and test again. The connection to the light or buzzer should be complete in one direction, but not when tested in the other direction. If continuity is present in both directions, or no continuity in both directions, the diode is bad.
A Story
It is not always the solenoid…even though it gets blamed most of the time. The other day, my brother called me because his EzGo suddenly stopped moving. It happened about 10 feet from his driveway. He pushed it to safety and thought he would need to replace the solenoid. He said he smelled something like sulfur and heard a sizzling sound. Solenoids are sealed, so the smell was probably not the solenoid.
I came over and raised the seat, and after switching the tow switch on, I checked the battery terminals first. There was yellow corrosion and they needed a good cleaning. After re-attaching the battery cables and turning the tow switch back off, the cart was back to its old self again. We took it out for a test run and all was good.
The solenoid didn’t click because the battery had no power. The corrosion and gunk caused it.
Conclusion
Solenoids are inexpensive to replace on golf carts. It’s smart to keep one nearby while working. You can find a variety of replacement solenoids for your particular model on Amazon.
