Your gas golf cart won’t start if there is a problem with the fuel, airflow, or electrical system. Any one of these areas can cause your golf cart to fail to start. Try these steps to troubleshoot and pinpoint the exact failure point.
The first time my gas golf cart wouldn’t turn over, I was lost trying to figure out what to do next. I learned that there are symptoms to watch for and what to do to fix the problem.
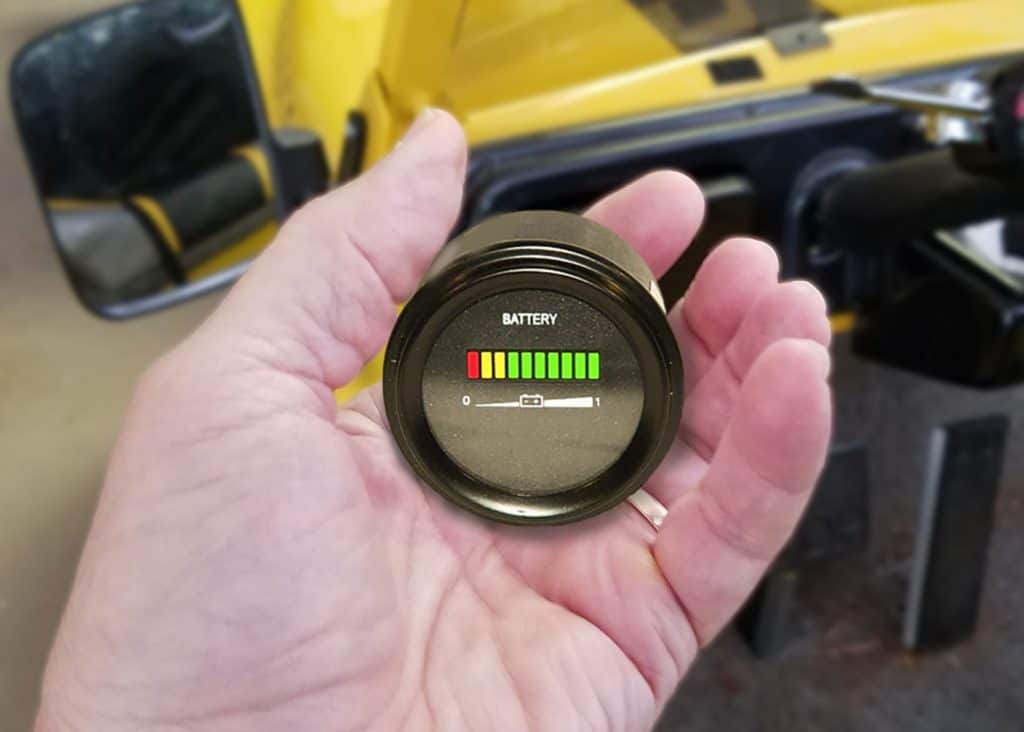
First, you turn the key, press the pedal, and listen for a click. If nothing happens, it’s most likely an electrical issue. On gasoline carts, check the battery that turns the engine over to make sure it is charged. On Electric carts, the battery pack should be checked for a full charge. If there is no click when the pedal is pushed, then there is no solenoid activity.
Troubleshooting Gas Golf Cart Won’t Start Problems And Systems
Fuses
Yes, sometimes the simplest items can cause the biggest problems. Close to the battery (at least in the Yamahas), there is a service panel that contains electrical components…including fuses.
Typically, the fuse box of a Club Car golf cart is conveniently situated beneath the dashboard. Alternatively, it can be found in a compartment close to the battery.
These are easy to check and eliminate from the troubleshooting procedure. Read the inside panel to locate the fuse or fuses and what rating they have. Test the fuse for continuity to see if it is really blown or not. We do this because if there is a problem further down the circuitry, a replacement might burn out immediately and you wouldn’t know the difference.
The Key Or Ignition Switch
Assuming that you’ve already checked the battery to see if it’s charged, we next need to check the key switch itself. They do wear out from time to time.
Before troubleshooting the key switch make sure that your forward-reverse switch is fully in the forward, reverse, or neutral position. Any space in between would cause an interruption in the electrical flow to the key switch.
Find the ignition wire on your golf cart. This runs from your ignition switch to the starter solenoid. Check this over for corrosion on either end and make sure you’ve got a tight connection. If the connections use a spade lug, pull the connection loose, wipe off the terminal, and plug it back in again. Try to start the cart now.
If this doesn’t fix the problem, let’s test the key switch. This test is done with a battery-powered continuity tester or an ohmmeter set to X1.
Set the switch in the “OFF” position and check for continuity between all terminals and the case of the switch. There should be no reading on the ohmmeter or no light on the continuity tester.
If this is an electric cart, set the switch in the “FORWARD” position. Check continuity between F and B terminals. There should be a reading or continuity (light on). Now set the switch in the “REVERSE” position. Check continuity between R, ACC, and B terminals. There should be a reading or continuity between any combination.
If this is a gasoline cart, set the switch to “ON” and take a reading between the terminals. There should be continuity.
If the key switch fails any of these tests, it’s worn out and should be replaced.
Here is a link to a few OEM Golf Cart Key Switches on Amazon.
How Do You Troubleshoot a Gasoline Golf Cart?
Check the fuel level, regardless of what the gauge says. I have seen a stuck fuel tank float baffle a mechanic for three hours while looking for a reason for a “full” tank not delivering the fuel.
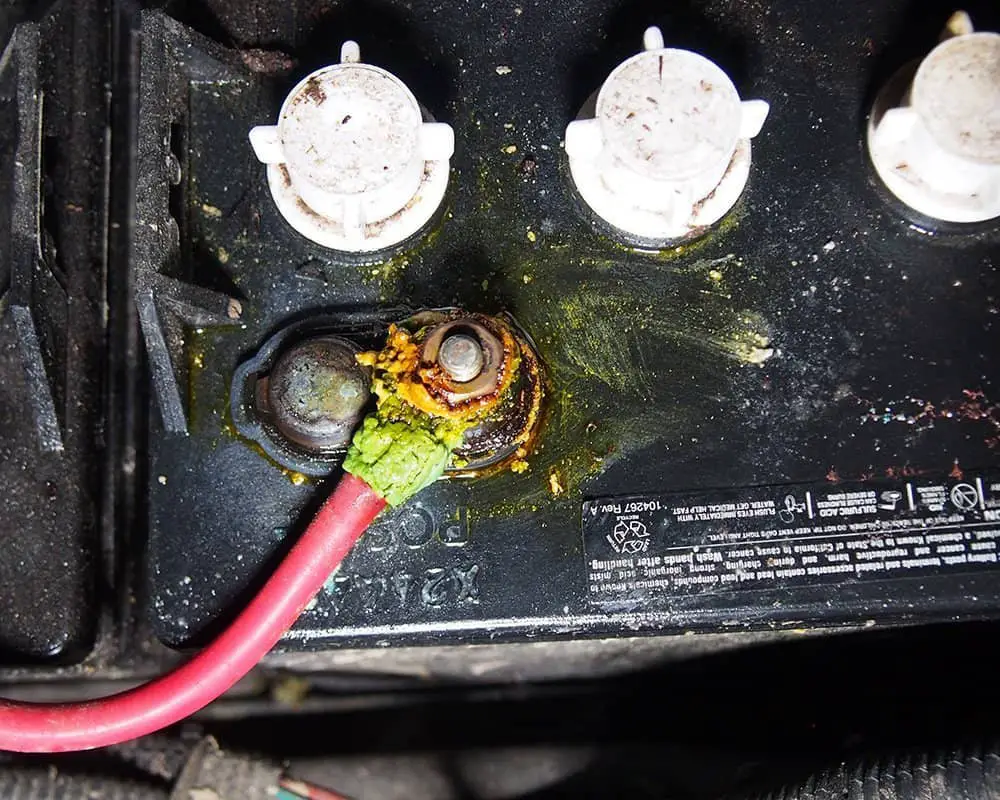
Check the battery to make sure it’s fully charged and the terminals are free of any corrosion. If you have determined that the key switch and cabling between it and the solenoid are working properly, and you still don’t get the click, then let’s examine the solenoid. There are extensive instructions for testing your solenoid on this page.
If the solenoid DOES engage and the engine turns over but doesn’t start, then this opens a whole slew of other testing procedures. We need to test for spark, fuel, and air.
Some Gasoline-powered golf carts have a small micro switch at the foot pedal. Sand and debris getting into this can keep it from operating and cause all of the electrical circuitry beyond it to not be energized. Be sure and check this little-known but vital part of the electrical system.
Be aware that some of the older models of gasoline-powered golf carts have points, just like an automobile. These need to be set properly following the specs for your make and model.
Spark Plugs
Let’s start with the spark plug. Remove the spark plug and check the condition… Is it all oily, fouled, or the gap bridged in any way? If this all looks good, then ground the spark plug threads to the bare metal of the engine and turn the engine over a couple of times. You should see a spark to the electrode. If the spark plug is plugged in properly to the spark plug cable and you’ve made a proper ground to the outside of it, no spark means a possible bad coil.
Fuel
Okay, the electrical system checks out and the engine still won’t start. Before screwing the spark plug back into the engine, put a couple of drops of gasoline down the hole first, or use some engine starter fluid. After the spark plug has been replaced, turn the engine over and see if it even tries to kick off. If it sputters and tries to start, then the likely culprit is the fuel pump followed by the carburetor.
The fuel pump on most gasoline powered carts usually has three hoses going to it. One is the gasoline in, one is the gasoline out, and the third is a hose that hooks to the crankcase vacuum.
The fuel pump has a diaphragm inside that is drawn in and out by the crankcase pressure, caused by the up-and-down motion of the piston. The diaphragm draws gas in with a pull through a one-way valve and pushes it out the other hose when the pressure reverses.
The two ports that the fuel passes through are marked with an arrow, either in or out. The unmarked port will be the line to the crankcase.
These hoses need to be checked for cracks or leaks. If you have the spare tubing available, it wouldn’t hurt to go ahead and replace these hoses.
If it turns out that the fuel pump is bad, it’s an easy item to replace and they are cheap. Check Amazon’s prices and availability here… Go ahead, I’ll wait.
- Features: Interchange # 72021-G01; Aftermarket # S 5148
- Application: EZGO TXT MEDALIST Golf Cart 4 Cycle 1994-2003 295cc & 350cc Robin Engine
- Package include: 1 x Fuel Pump

Back so soon? See? I told you they were inexpensive.
The carburetor is our next stop in the fuel diagnosis. Plugged jets, stuck floats, leaking gaskets….there are quite a few places on a carburetor that could cause problems. Your best bet for this procedure is to completely remove the carburetor and clean/rebuild it. After I found out the carburetor was cheaper in most cases than the fuel pump, I just ordered up a new one. As of this writing, it is under $20.
Air
Check the air filter element for dirt and make sure it is not clogged. It can cause your engine to not get enough air and stall out. Try starting the engine with the air cleaner removed to see if this is causing the problem. Do not leave the air filter out if the problem gets better. It is there to protect the engine from dirt and it costs a lot more to fix the engine than it does to get a new filter. In the meantime, try to know the excess dirt and dust out or blow it out with air pressure.
How Do You Troubleshoot An Electric Golf Cart?
The electric cart has many battery connections to be checked over and cleaned of all corrosion. A single battery failure in the battery pack could keep your cart stationary. Clean each of the terminals and tighten them back down.
How Do You Know When Golf Cart Batteries Are Going Bad?
As batteries start to lose their health and take longer to accelerate, you find that you can’t hit the top speed anymore or have problems climbing hills.
It can begin with the batteries taking longer and longer to charge, and the charge they take, they don’t keep very long.
Physical signs can include bulging sides, cracks or, in extreme cases, leaking battery acid.
If the engine or motor turns over slowly, get out a multimeter and make this quick test. Set the voltmeter to 200-volt dc, and test across each individual battery’s posts placing a probe on each terminal. This does not require you to disconnect the batteries so long as you do one battery set at a time. On a 6 volt battery, you should have a reading of 6.1 to 6.3 volts. If you get a reading around 4 or 5 volts then the battery didn’t charge or is faulty.
If none of these symptoms are making themselves apparent, then you can probably move on to the next item on your checklist…or you can make sure and test the batteries. Use the link below for instructions.
Why Does The Golf Cart Battery Drain When Everything Is Off?
If you suspect your battery charge is being drained but are still not faulty, here’s a quick way to isolate the culprit. Disconnect the negative battery cable ground wire and connect your multimeter set to measure the voltage between the battery terminal and the ground wire. If you’ve turned everything off and are still getting a reading, then you have a faulty component in the electrical system. At this point, we’ll need to start pulling fuses and disconnecting things one of the time to find out what is draining the battery.
If your electrical system is simple and only has something like a headlight switch, and you find the disconnecting this stop the battery flow on the voltmeter, then it can be a faulty switch allowing a small amount of current to flow through the switch and not completely disconnecting in the off position.
A faulty speed controller on an electric cart also be draining your battery but not completely disconnecting power from the drive components.
Speed Controller Test on Newer Electric Golf Carts
Connect your voltmeter between the main negative terminal on the battery pack and the M- terminal on the controller.
Push pedal far enough for the solenoid to click. At this point, you should read the full pack voltage. If you do not have full voltage then start troubleshooting the red and blue cables and all the components connected to them to ensure they are making steady contact.
If you have full battery pack voltage, slowly push the pedal to the floor.
The voltage should smoothly decrease to close to Zero. If not then troubleshoot the throttle input. If the reading DOES go to zero or near zero, the motor should be turning.
Alternately, testing the voltage between B+ and M- would be the same as testing across the motor. Pedal up would be zero, pedal down would be full voltage.
How Do I Know If My Golf Cart Solenoid Is Bad?
Symptoms Of A Bad Solenoid
Older golf carts used a series of solenoids to drive the cart forward and backward and set the speed of that motion.
Newer electric golf carts utilize a single solenoid that controls the power to the controller. The solenoid can be tested simply by applying 6 to 12 volts to the control terminals to check actuation and continuity.
There are a series of switches in the circuitry, namely the reed switch, forward and reverse micro switch, key switch, and footswitch. All of these must be in working order before voltage can be applied to the small terminals.
When the small terminals have voltage applied to them the solenoid should CLICK and there should be continuity between the large terminals. If not, then the solenoid is probably faulty.
Testing Golf Cart Solenoids
- The first and most obvious symptom is the gas golf cart not turning over. If it is a gas-powered cart, the engine doesn’t turn over, and if it is an electric cart, the cart doesn’t move.
- A gas golf cart clicking but not starting indicates a solenoid activating but perhaps not passing the voltage to the starter.
- The engine on the gas-powered cart starts, but the starter doesn’t disengage after starting. When the contacts weld together, the power to the starter never stops and will result in destroying the starter, the wiring, or the flywheel.
- The relay clicks and works sometimes, and sometimes it doesn’t. This can be a faulty wire connection, but can also mean the solenoid is beginning to fail.
- The golf cart solenoid doesn’t click when the accelerator is pressed. This again can be faulty wiring or a failed solenoid.
- The golf cart solenoid clicks, but nothing happens. This will sometimes be the result of burned contacts or contacts no longer coming in contact with each other as shown in the illustration at the bottom of this page. This can also be the result of not enough voltage amps reaching the solenoid control connection due to a low battery.
Conclusion
Saving money by doing your own troubleshooting not only helps the wallet but increases your familiarity with the vehicle you love to keep running. I get a real kick out of solving these little bumps in the road and enjoy not having to load the cart up and have someone else charge me for a simple repair I could handle in a few minutes. I hope this article will help get you back on the paths and trails soon!


